Blogging for money is not a theoretical concept, but it’s a reality. Anyone with some basic knowledge of blogging, SEO, and a general idea of how the Internet works can start a profitable blogging business for free.
The blog you are reading now is a real-life example of a money-making blog.
The purpose of this guide is to help you understand how to start a blog and make money by avoiding mistakes or losing valuable time on tasks that won’t contribute to your main goal. When I started (in 2002), it took me several years to discover what I was doing wrong and how to turn things around.
Hopefully, this comprehensive step-by-step guide will put you in the right direction from the very beginning and give you a solid plan to follow that will generate results in the fastest possible way.
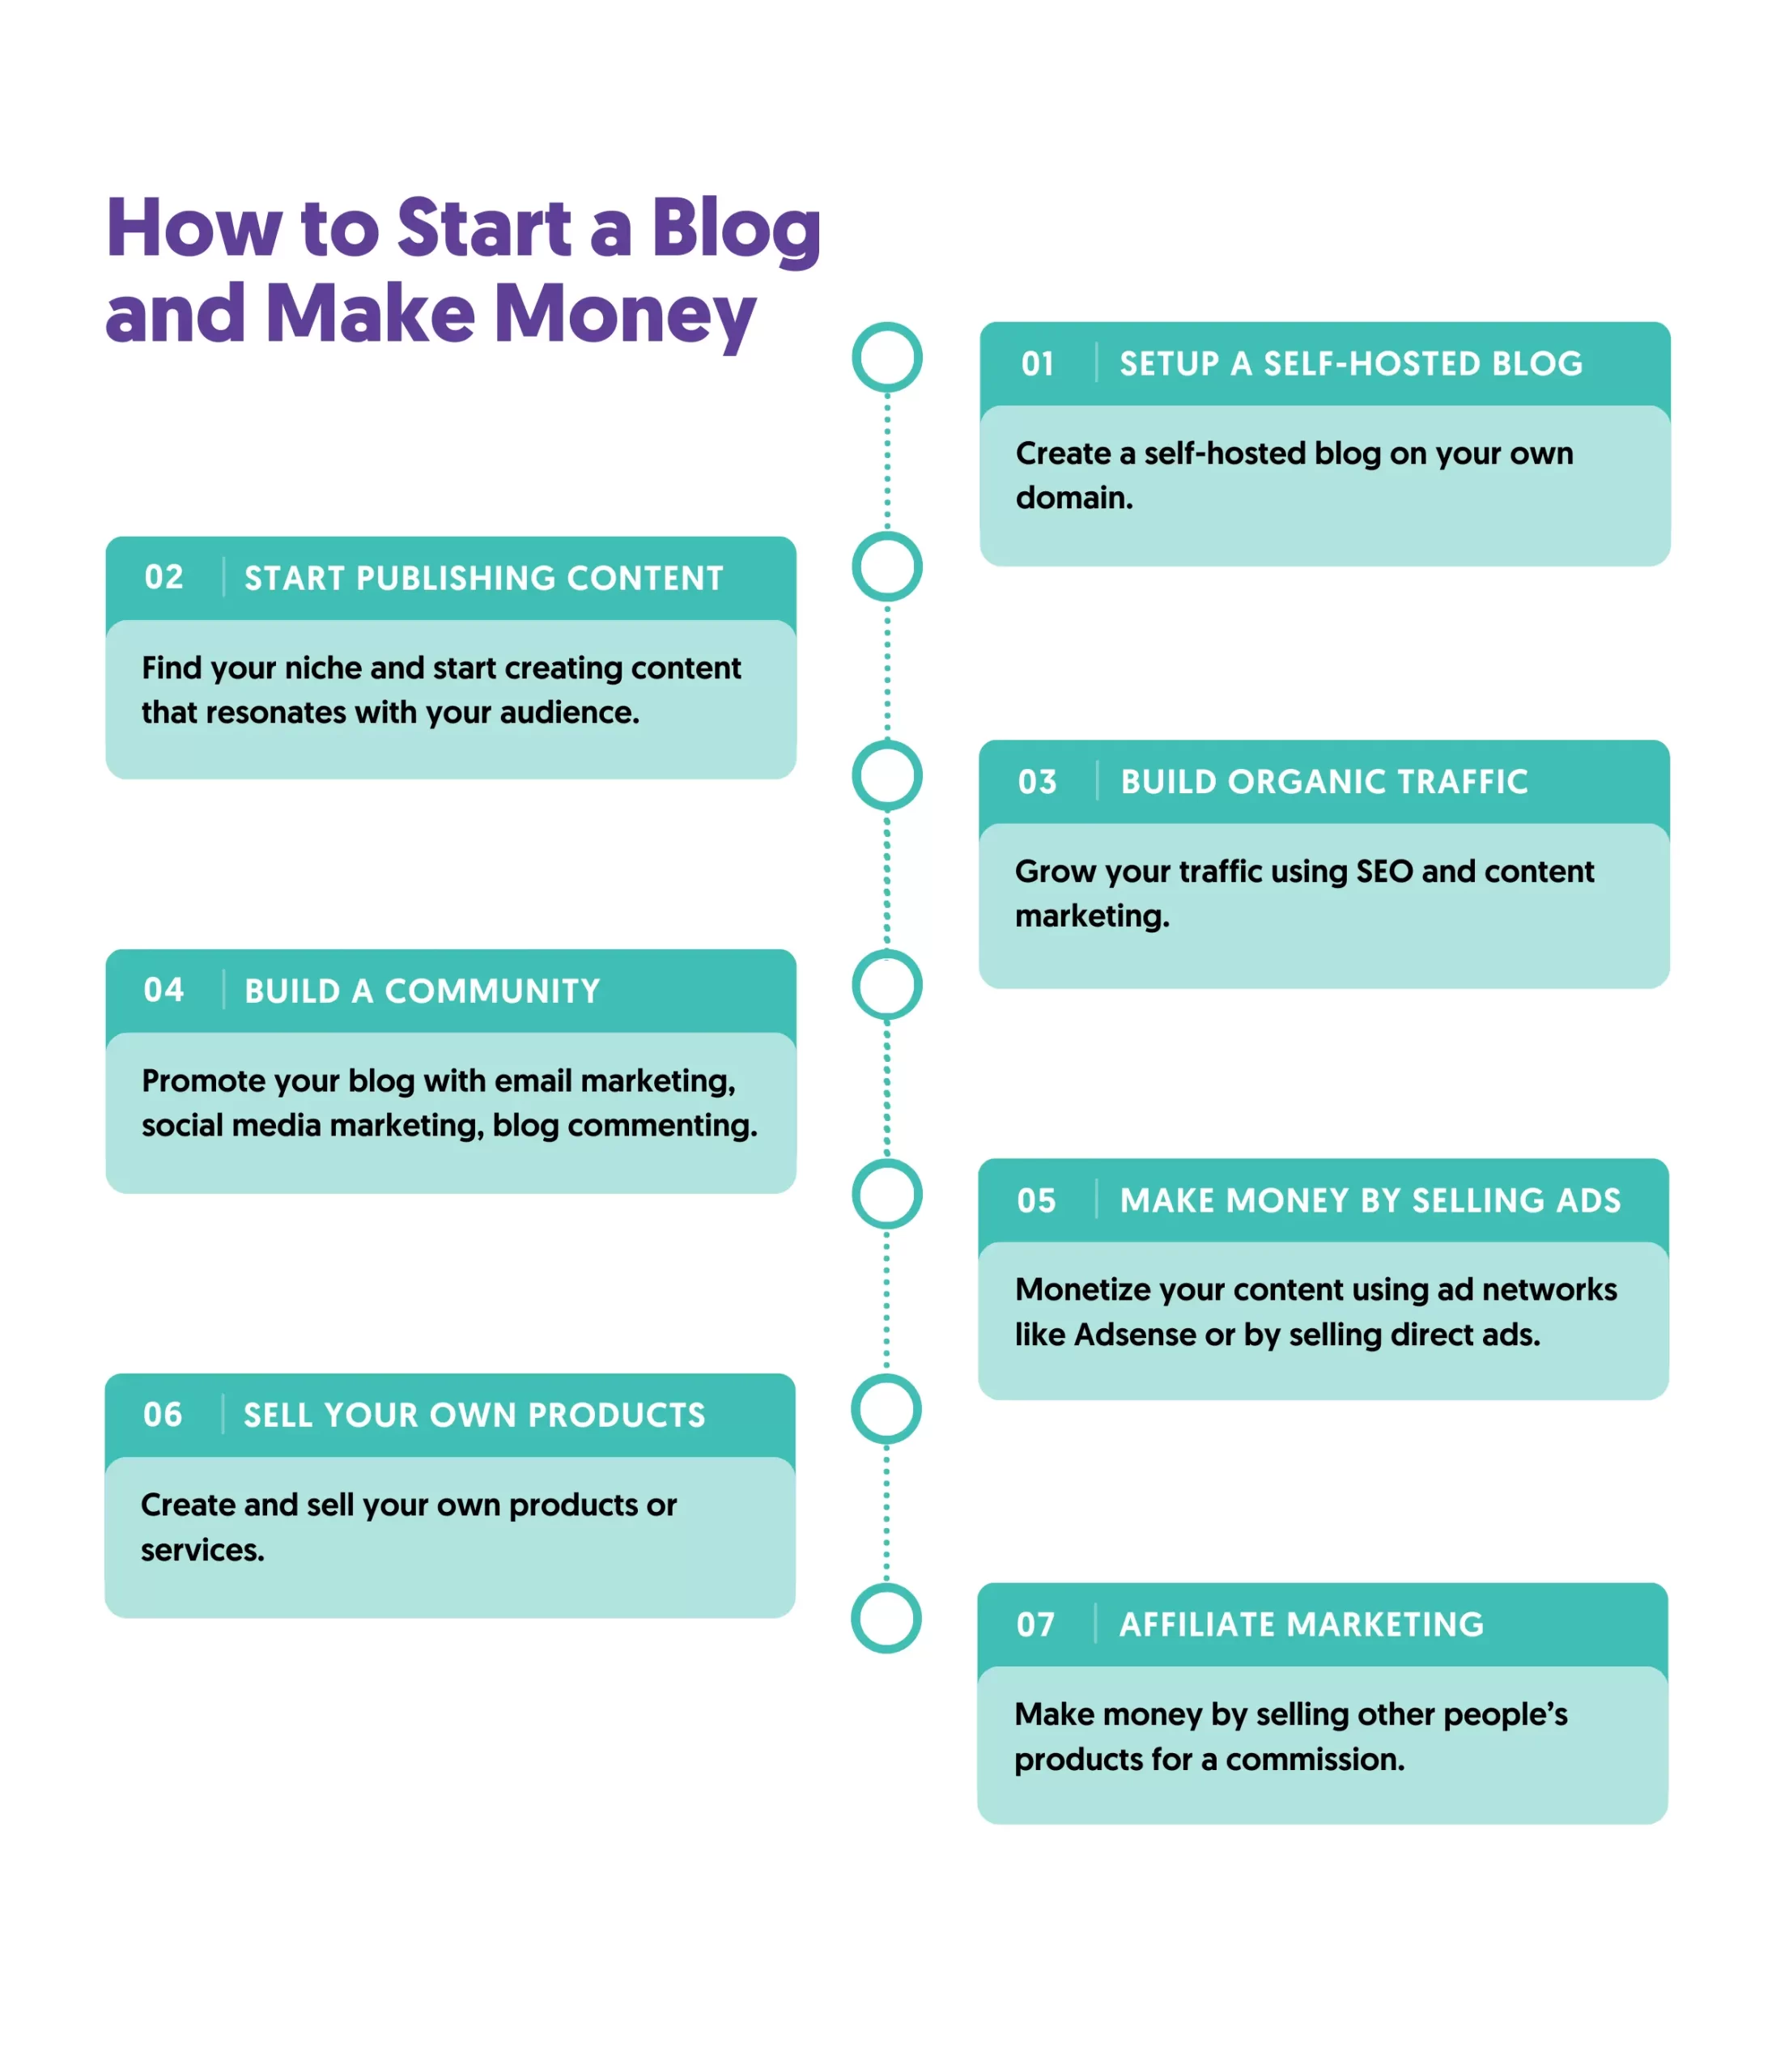
How To Start A Blog And Make Money
- Setup Your Own Self-Hosted Blog
- Start Publishing Great Content
- Build Organic Traffic To Your Blog
- Build A Community Around Your Blog
- Start Making Money By Selling Ads
- Make Money By Selling Your Own Products Or Services
- Make Money Through Affiliate Marketing
1. Setup Your Own Self-Hosted Blog
When starting a blog, you have two choices. You can create a blog on a free platform like Medium.com, WordPress.org, or Weebly. With this option, you don't have to pay anything, but you also get some disadvantages like:
- Your domain name will be part of the platform, i.e., www.myblog.wordpress.org.
- You have less control and flexibility on what you can do with your blog.
- When your traffic grows, and you need more features, you'll have to pay for add-ons.
- Free blog platforms limit your ability to monetize your blog's content, making it harder to make money from your blog.
The second choice is to set up a self-hosted blog. The cost can be as low as $3 per month, and it’s so easy these days to register a domain name and create a blog. All you need is a bit of help and pointers in the right direction. In summary, to start a blog, you need to follow these steps:
- Register a domain name
- Sign up for web hosting
- Setup your blog
- Publish your first blog post!
Don't worry if this sounds confusing. You can register a domain name, choose a hosting solution, and create an awesome blog in 30 minutes or less using a wizard. Click this link to go to Bluehost and follow their step-by-step guide. You'll have your self-hosted blog with WordPress installed in minutes, and you can proceed with the rest of this guide.
If you want more guidance, read our detailed blog setup guide. If you want more options, Hubspot's hosting solution is a great alternative.
Mistakes to avoid when setting up your blog.
As a beginner in blogging, it's normal to make mistakes. That's perfectly OK, provided you learn from your mistakes and do not repeat them. When it comes to starting a blog, have these tips in mind.
Keep your focus on your main goal.
Your goal is to reach a point where you will start making money from your blog, and you should not forget that. I know from experience that a common mistake beginners make is spending too much time and effort in designing the ‘perfect blog’, forgetting that at the early stages (when there is no traffic coming in), nobody cares about your website’s design, and that includes Google.
I’m not saying that website design is not important. It is, but not at the early stages. Your primary goal at this step is to have a blog running and start creating content that will get you traffic. There is so much work involved in getting traffic (and potential customers), and you should devote your energy to those tasks from the very beginning.
Keep it simple.
If you are starting now, try to keep everything as simple as possible. Don’t overcomplicate things because you will get lost in the process. You have a lot to learn, and as you go along, you will change your mind about many things, so save your time and energy for the more complicated tasks.
The fastest way to learn how to start a blog and make money is to follow a proven step-by-step blueprint. The Digital Marketing Full Course will teach you how to make money blogging using digital marketing. You'll learn how to create content for your blog, how to get Google traffic, and how to turn traffic into money with affiliate marketing.
Get Started
2. Start Publishing Great Content
So, you have a website up and running, that’s great! Now it’s time to get to one of the most difficult and challenging tasks of blogging, which is no other than creating the actual content for your blog.
Keep this in mind: a blog with mediocre content is just another blog in the millions of already published blogs, and a blog with great content is a money-making business.
Having said that, it is important to understand from the beginning the importance of content for your blog’s success.
Great (good, superb, or fantastic – you choose) content will get you traffic (we will see below how), build your credibility, and make you money (in different ways).
So, what is great content?
Great blog content is not necessarily text, it can be images, videos, infographics, or even audio. But, to achieve high rankings on Google (and other search engines), your content should be primarily text.
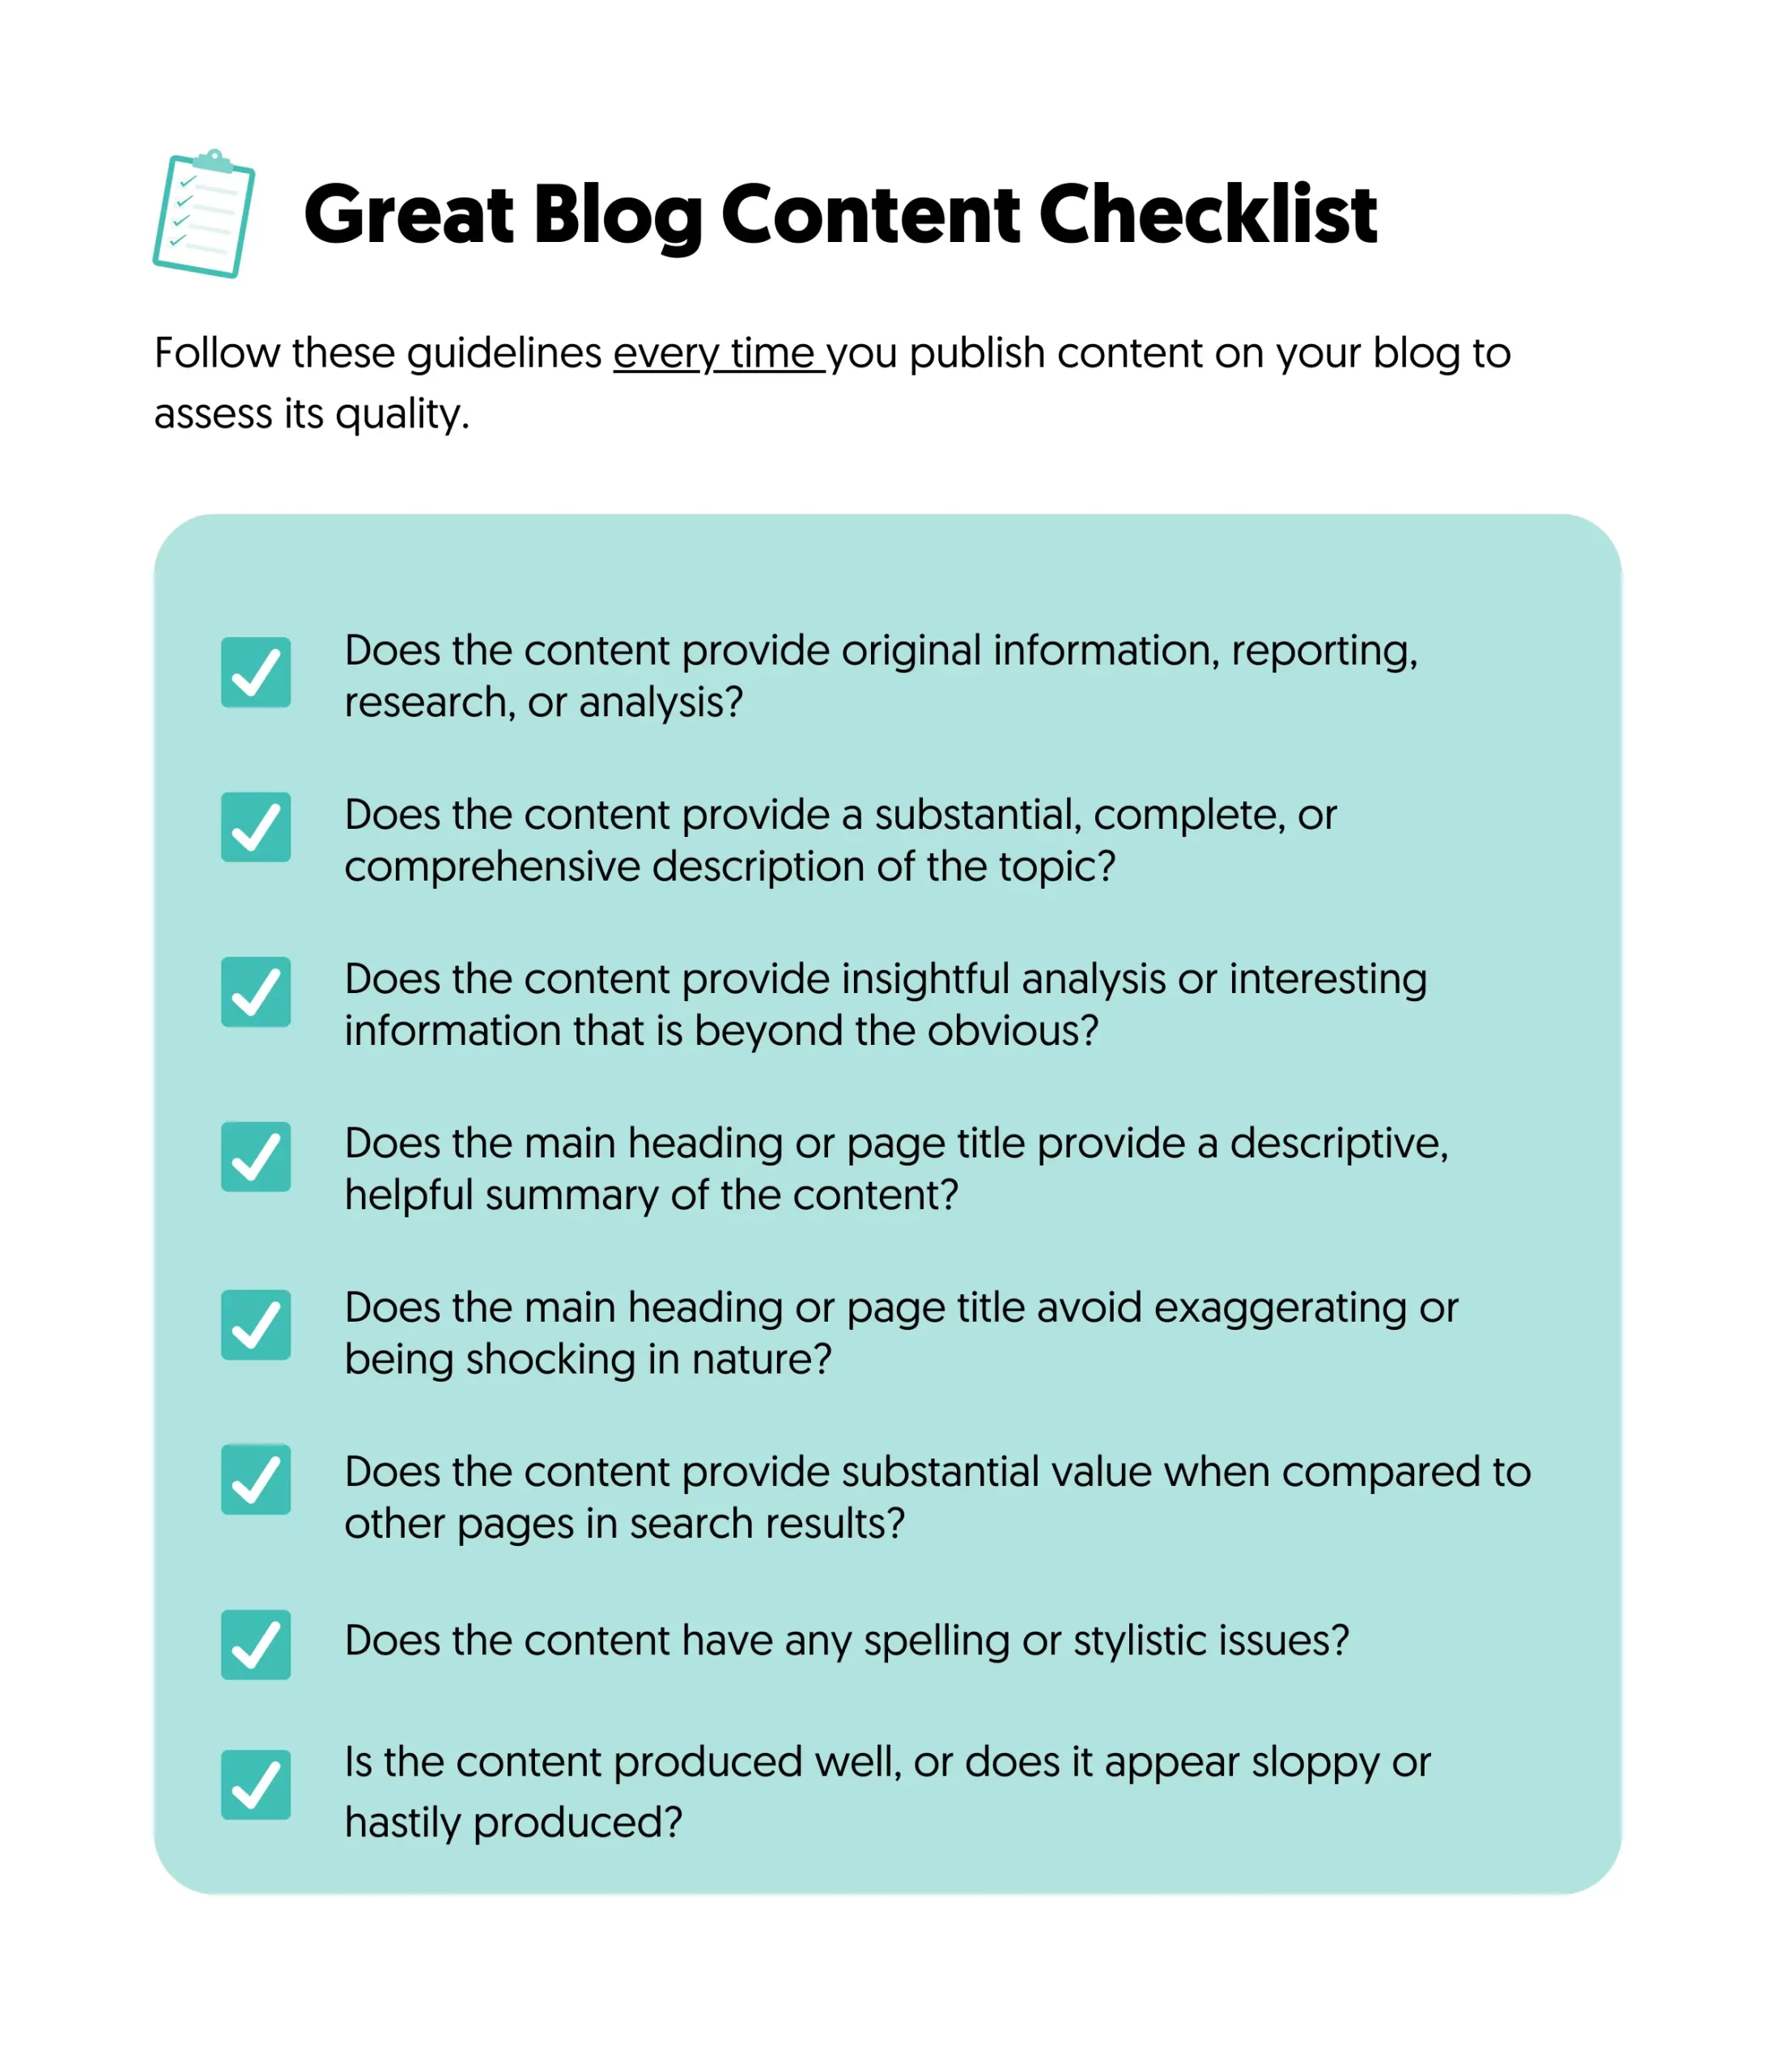
Great content has the following characteristics:
- It’s unique for your website (it’s not an exact copy of an already published post)
- It’s free of spelling and grammar mistakes
- It’s meaningful
- It’s insightful
- It’s unbiased
- It’s something that helps people do/understand/learn something
- It’s easy to read
Let’s see how you can practically create good content for your website.
Choose a niche that you enjoy reading/researching/writing.
When you start writing content for your blog, you should create content that meets the criteria of good content (as explained above). If you are not passionate about the niche, this process will be very difficult, and you will give up before you even begin.
A money-making blog needs a lot of content, and you need to come up with a lot of ideas and topics to write about weekly (if not daily), so have this in mind when choosing your niche.
Choose a topic with a decent audience.
It’s not enough to be passionate about a topic, others should be too. Remember that to make money from your blog, you will need people to buy your products or advertisers to pay money for your ad space. If your selected topic does not have a decent audience, none of the above will happen.
Do a preliminary search as to the potential of your niche by visiting Google and searching for phrases (keywords) that come to mind.
Look for the number of results and types of websites that appear on the first pages of Google.
Don’t go too broad. Make it specific.
While you do need a decent audience for your chosen topic, don’t go too broad because chances are that there are already thousands of websites about the same subject.
Popular topics have a bigger audience, but they are also very competitive. If you are starting now as a solo blogger, it would be easier to compete with other bloggers rather than online businesses that have teams of writers and SEOs behind them.
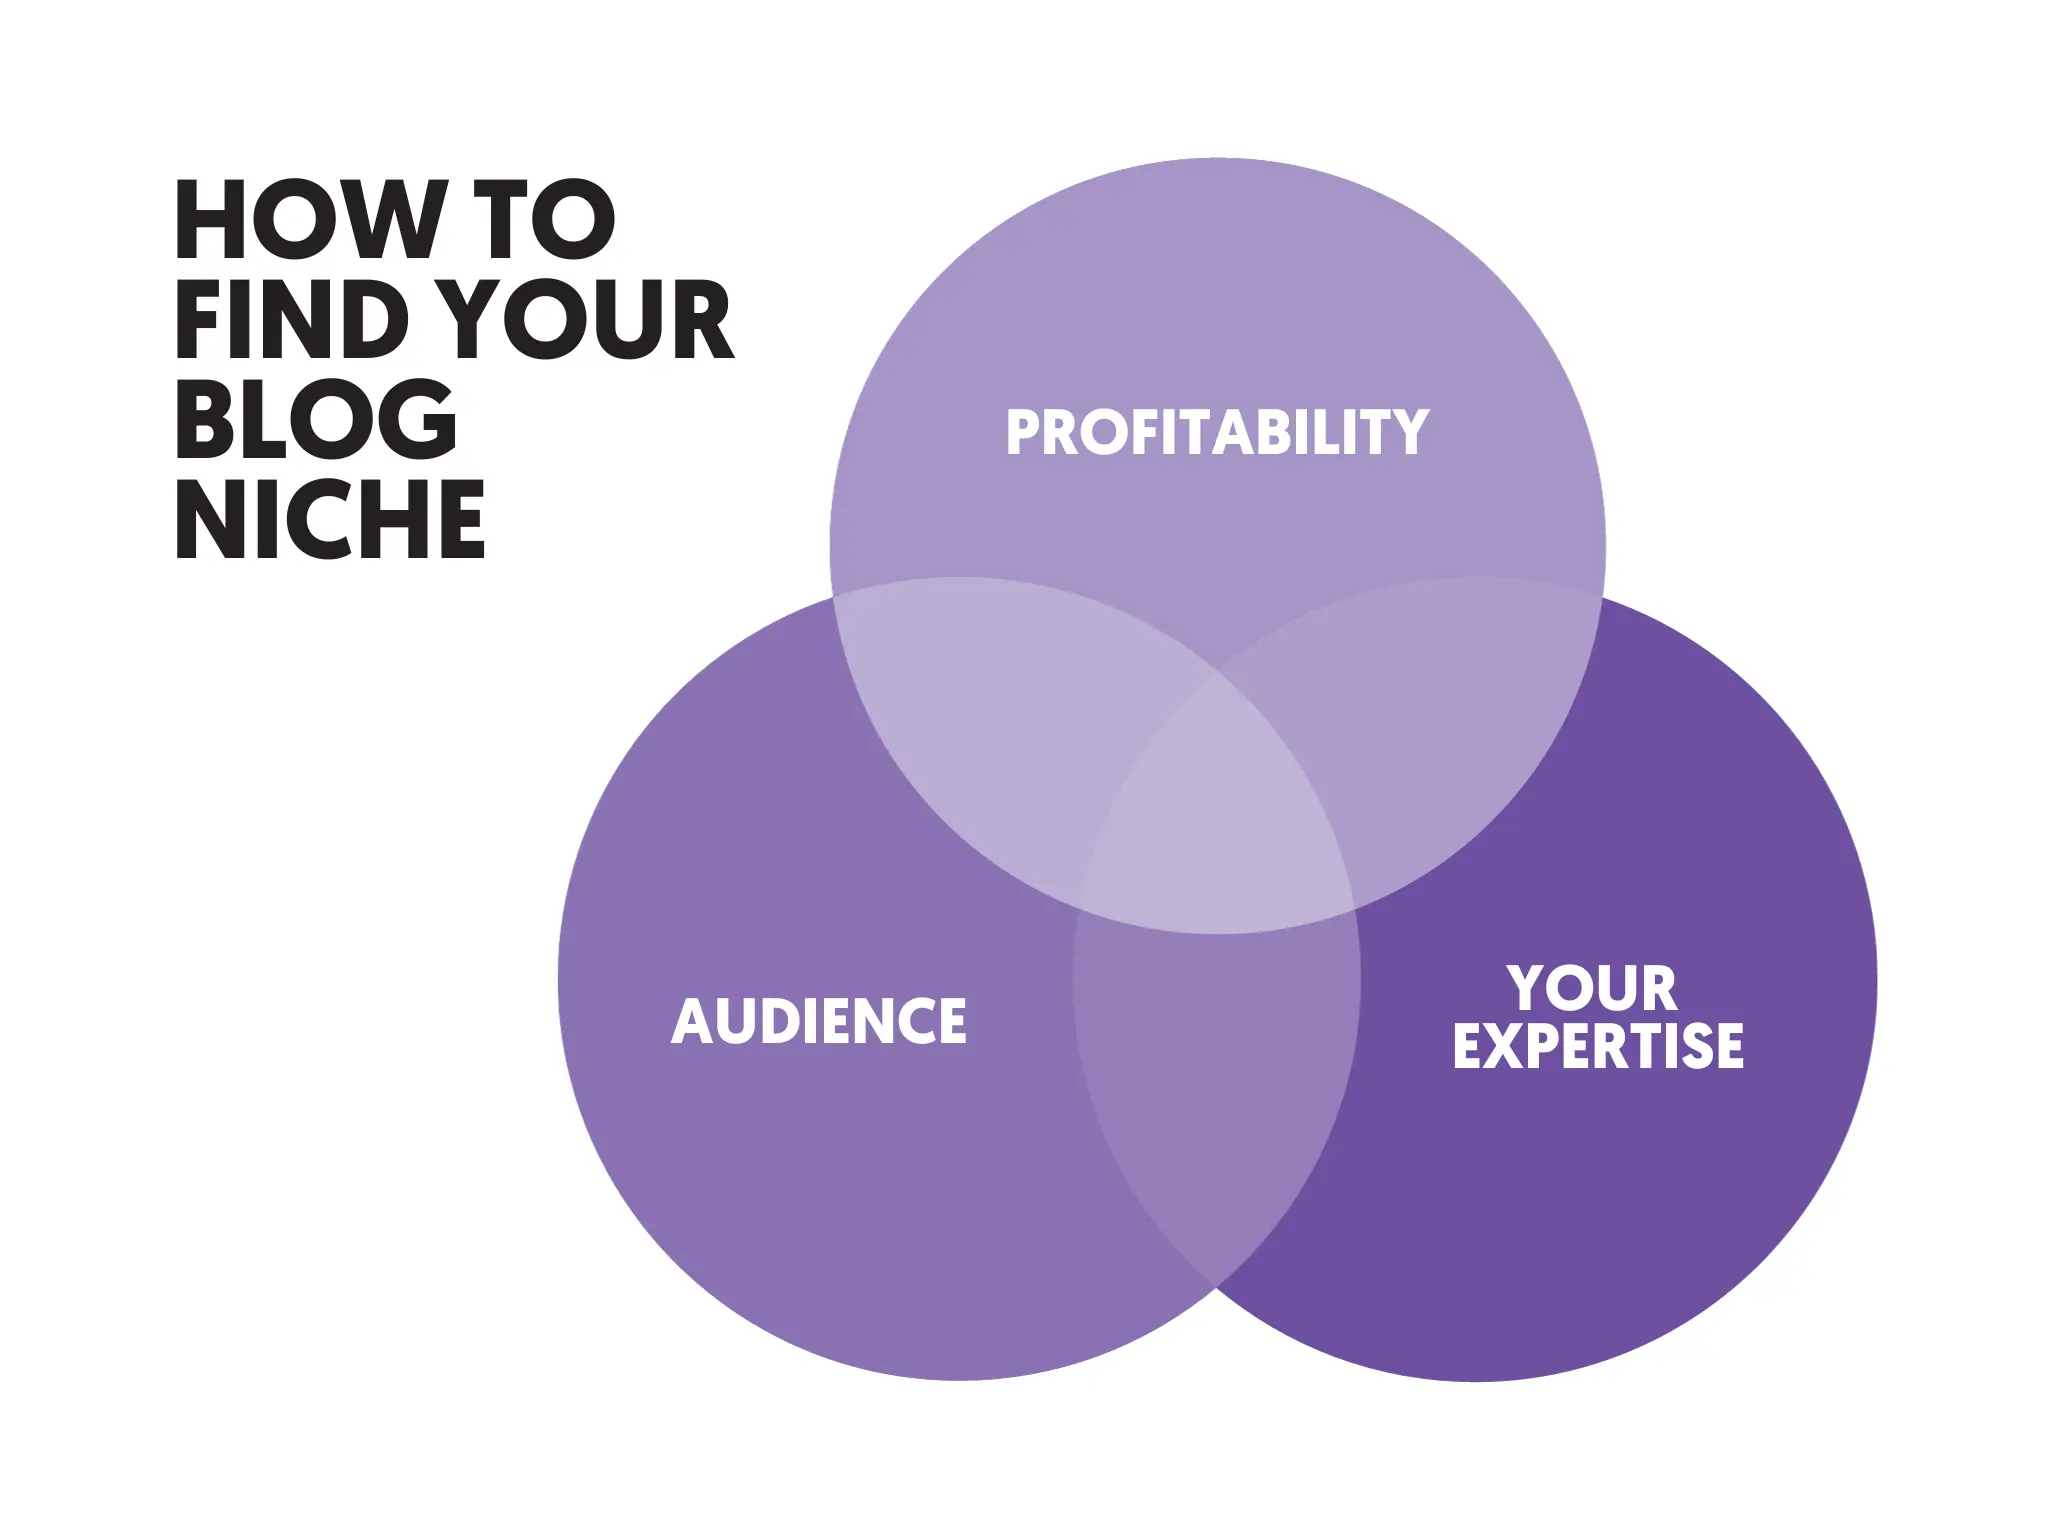
Let me give you an example to make this easier to understand.
Let’s say you're passionate about ‘fitness’ and ‘healthy living’. If you do a search on Google for ‘weight loss’ or ‘dieting’, you will get thousands of results, many of them from online magazines or websites that have been established for years, loaded with thousands of content pages.
It’s impossible for a new blog to compete with these and get Google traffic for such broad terms.
What you can do instead is to narrow down your topic and go after a specific niche that is still related to your passion but with less competition. An example would be “healthy living advice for kids”.
It’s a topic with a lot of interest, mainly from parents who want to learn how to provide a healthy lifestyle for their kids, and they also hold the money to buy a product (maybe an ebook) to help them do so.
This process of finding out what to write in your blog is called keyword research. It’s a process that you need to master from the very beginning, and I strongly suggest you take some time and read the following articles:
Resources to learn more
- The Keyword Research Process - 10 easy steps to perform keyword research for your blog.
- What Are Long-Tail Keywords - The importance of long-tail keywords for a blog's success.
3. Build Organic Traffic To Your Blog
To make money from your blog, you need organic traffic and not just traffic in general. Organic traffic is generated from search engines (mainly Google).
What makes organic traffic more valuable than any other source of traffic is the ‘user intent’.
A user who types a query in Google’s search box has a clear intent. He or she is either looking for an answer to a question, wants to learn something, to find information, or to buy a product. Their intent is expressed through the actual search terms they use in the search query.
For example, a user searching for “how to do an SEO audit of my website”, is clear that is looking for a step-by-step guide on how to perform an SEO audit.
It is very specific, and to be eligible to rank for that term (or related), you need to provide Google with a thorough guide on how to perform a manual audit.
When you do this correctly, your blog posts will eventually rank high on Google, and you will start getting targeted organic traffic to your blog.
How to get organic traffic to your blog?
You need great content. Although I have covered this in step 2 above, I’m mentioning this again because it is extremely important. If your content is not up to Google standards, then whatever you read below will not work.
You need to get your technical SEO correct.
Technical SEO has to do with your blog setup and how well it is optimized for search engines.
Your blogging platform (especially if it’s WordPress) is, by default, SEO friendly, but still, there are several things to check and change to make it even better. You need to optimize things like:
- Blog structure
- URL Structure
- XML Sitemaps
- Structured Data Markup
- Canonical URLs
- Website Speed
- Mobile Friendliness
They are all very important in the process.
You need to get your On-Page SEO correct.
On-page SEO goes one step above technical SEO and has to do with making your content more visible to search engines.
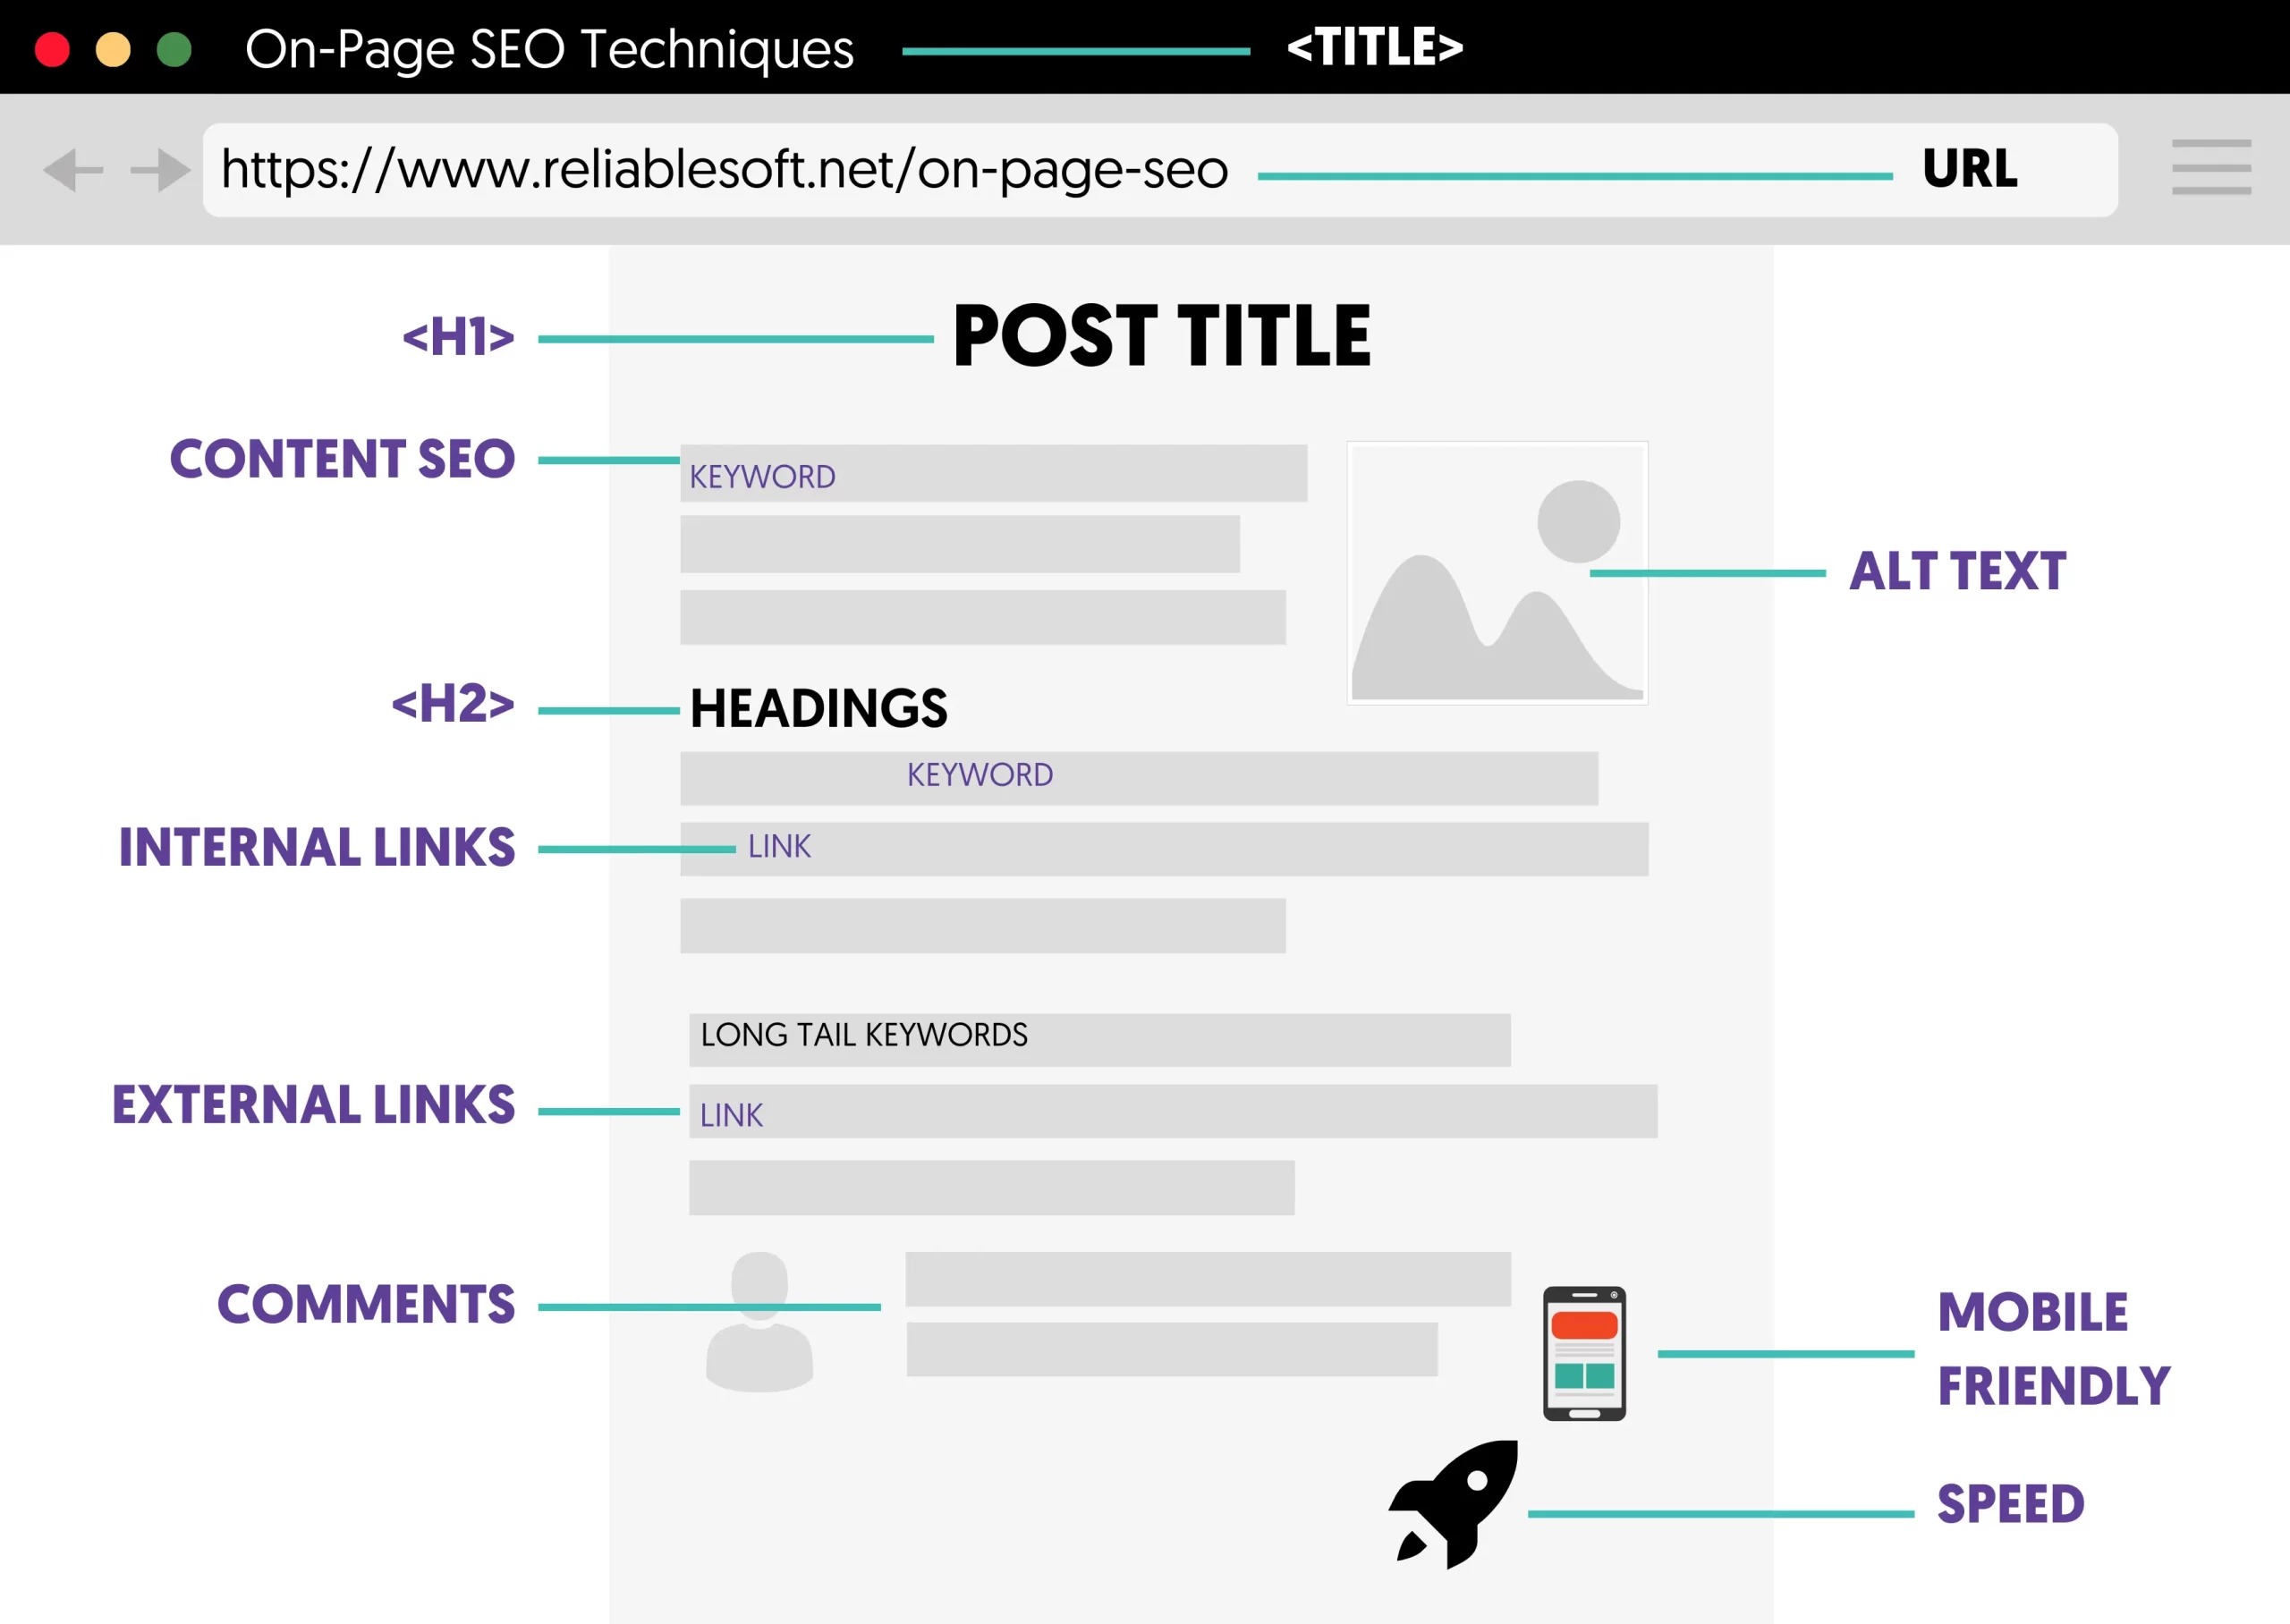
When reviewing your on-page SEO, you will deal with things like:
- Optimizing titles and description
- Optimizing images
- Internal linking
- Headings and page structure
- Content SEO
You need to work on your Off-Page SEO
All the actions described so far for increasing organic traffic have to do with things you can change/optimize on your website. Another very important aspect of getting more traffic from search engines is off-page SEO.
Off-page SEO is the process of promoting your website on the Web to increase credibility about your brand and improve your search engine rankings.
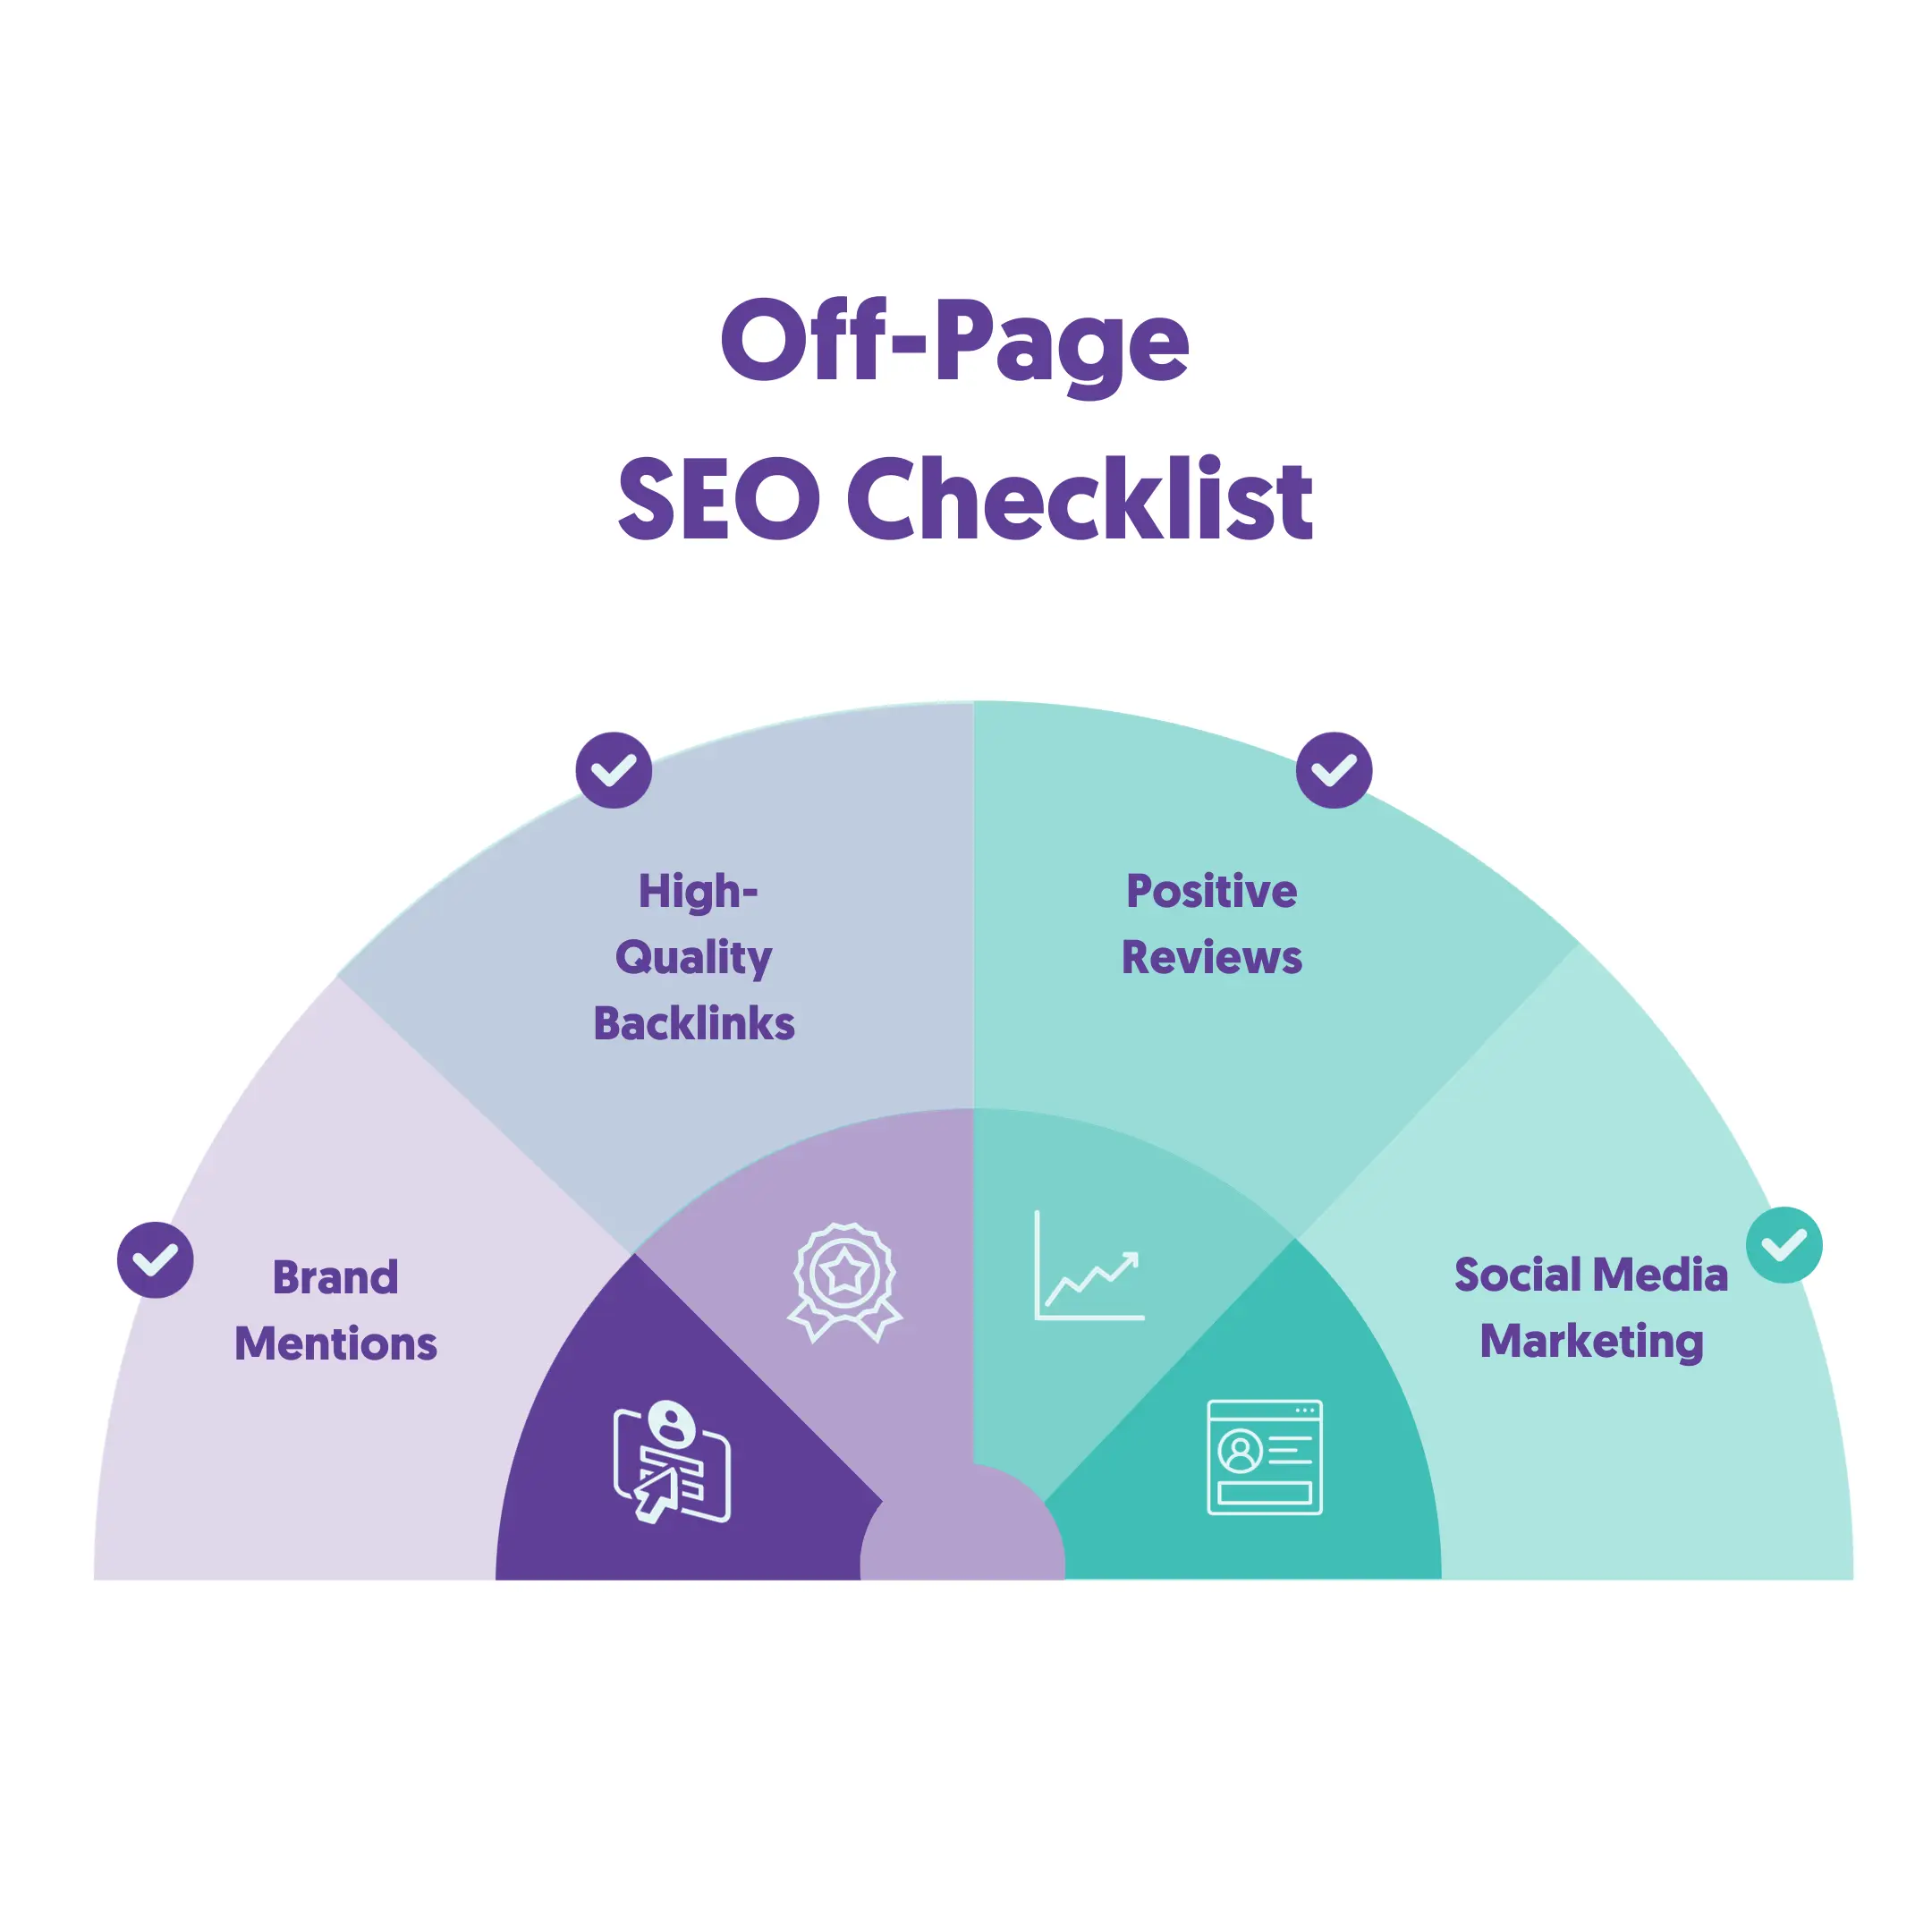
In other words, you need to let other website owners know that you exist. The benefits of doing so are many:
- Search engines are more likely to rank higher websites that have references (links) from other websites.
- You will get more traffic.
- You will establish yourself as an expert in your niche.
As I always like to say: Good on-page SEO can get you to the first pages of Google, while good off-page SEO can get you to the top positions.
The most popular and effective off-page SEO method is link building.
What is link building, and why it is important?
Search engine ranking algorithms are always looking for ways to understand the quality of a website. The primary intent of Google is to keep their users happy by presenting them with websites that have good content, are easy to navigate, and in general, are considered to be of high quality.
Besides the on-page SEO optimizations, another way to convince them that your website falls into this category is to have external links from other websites pointing to your website’s pages.
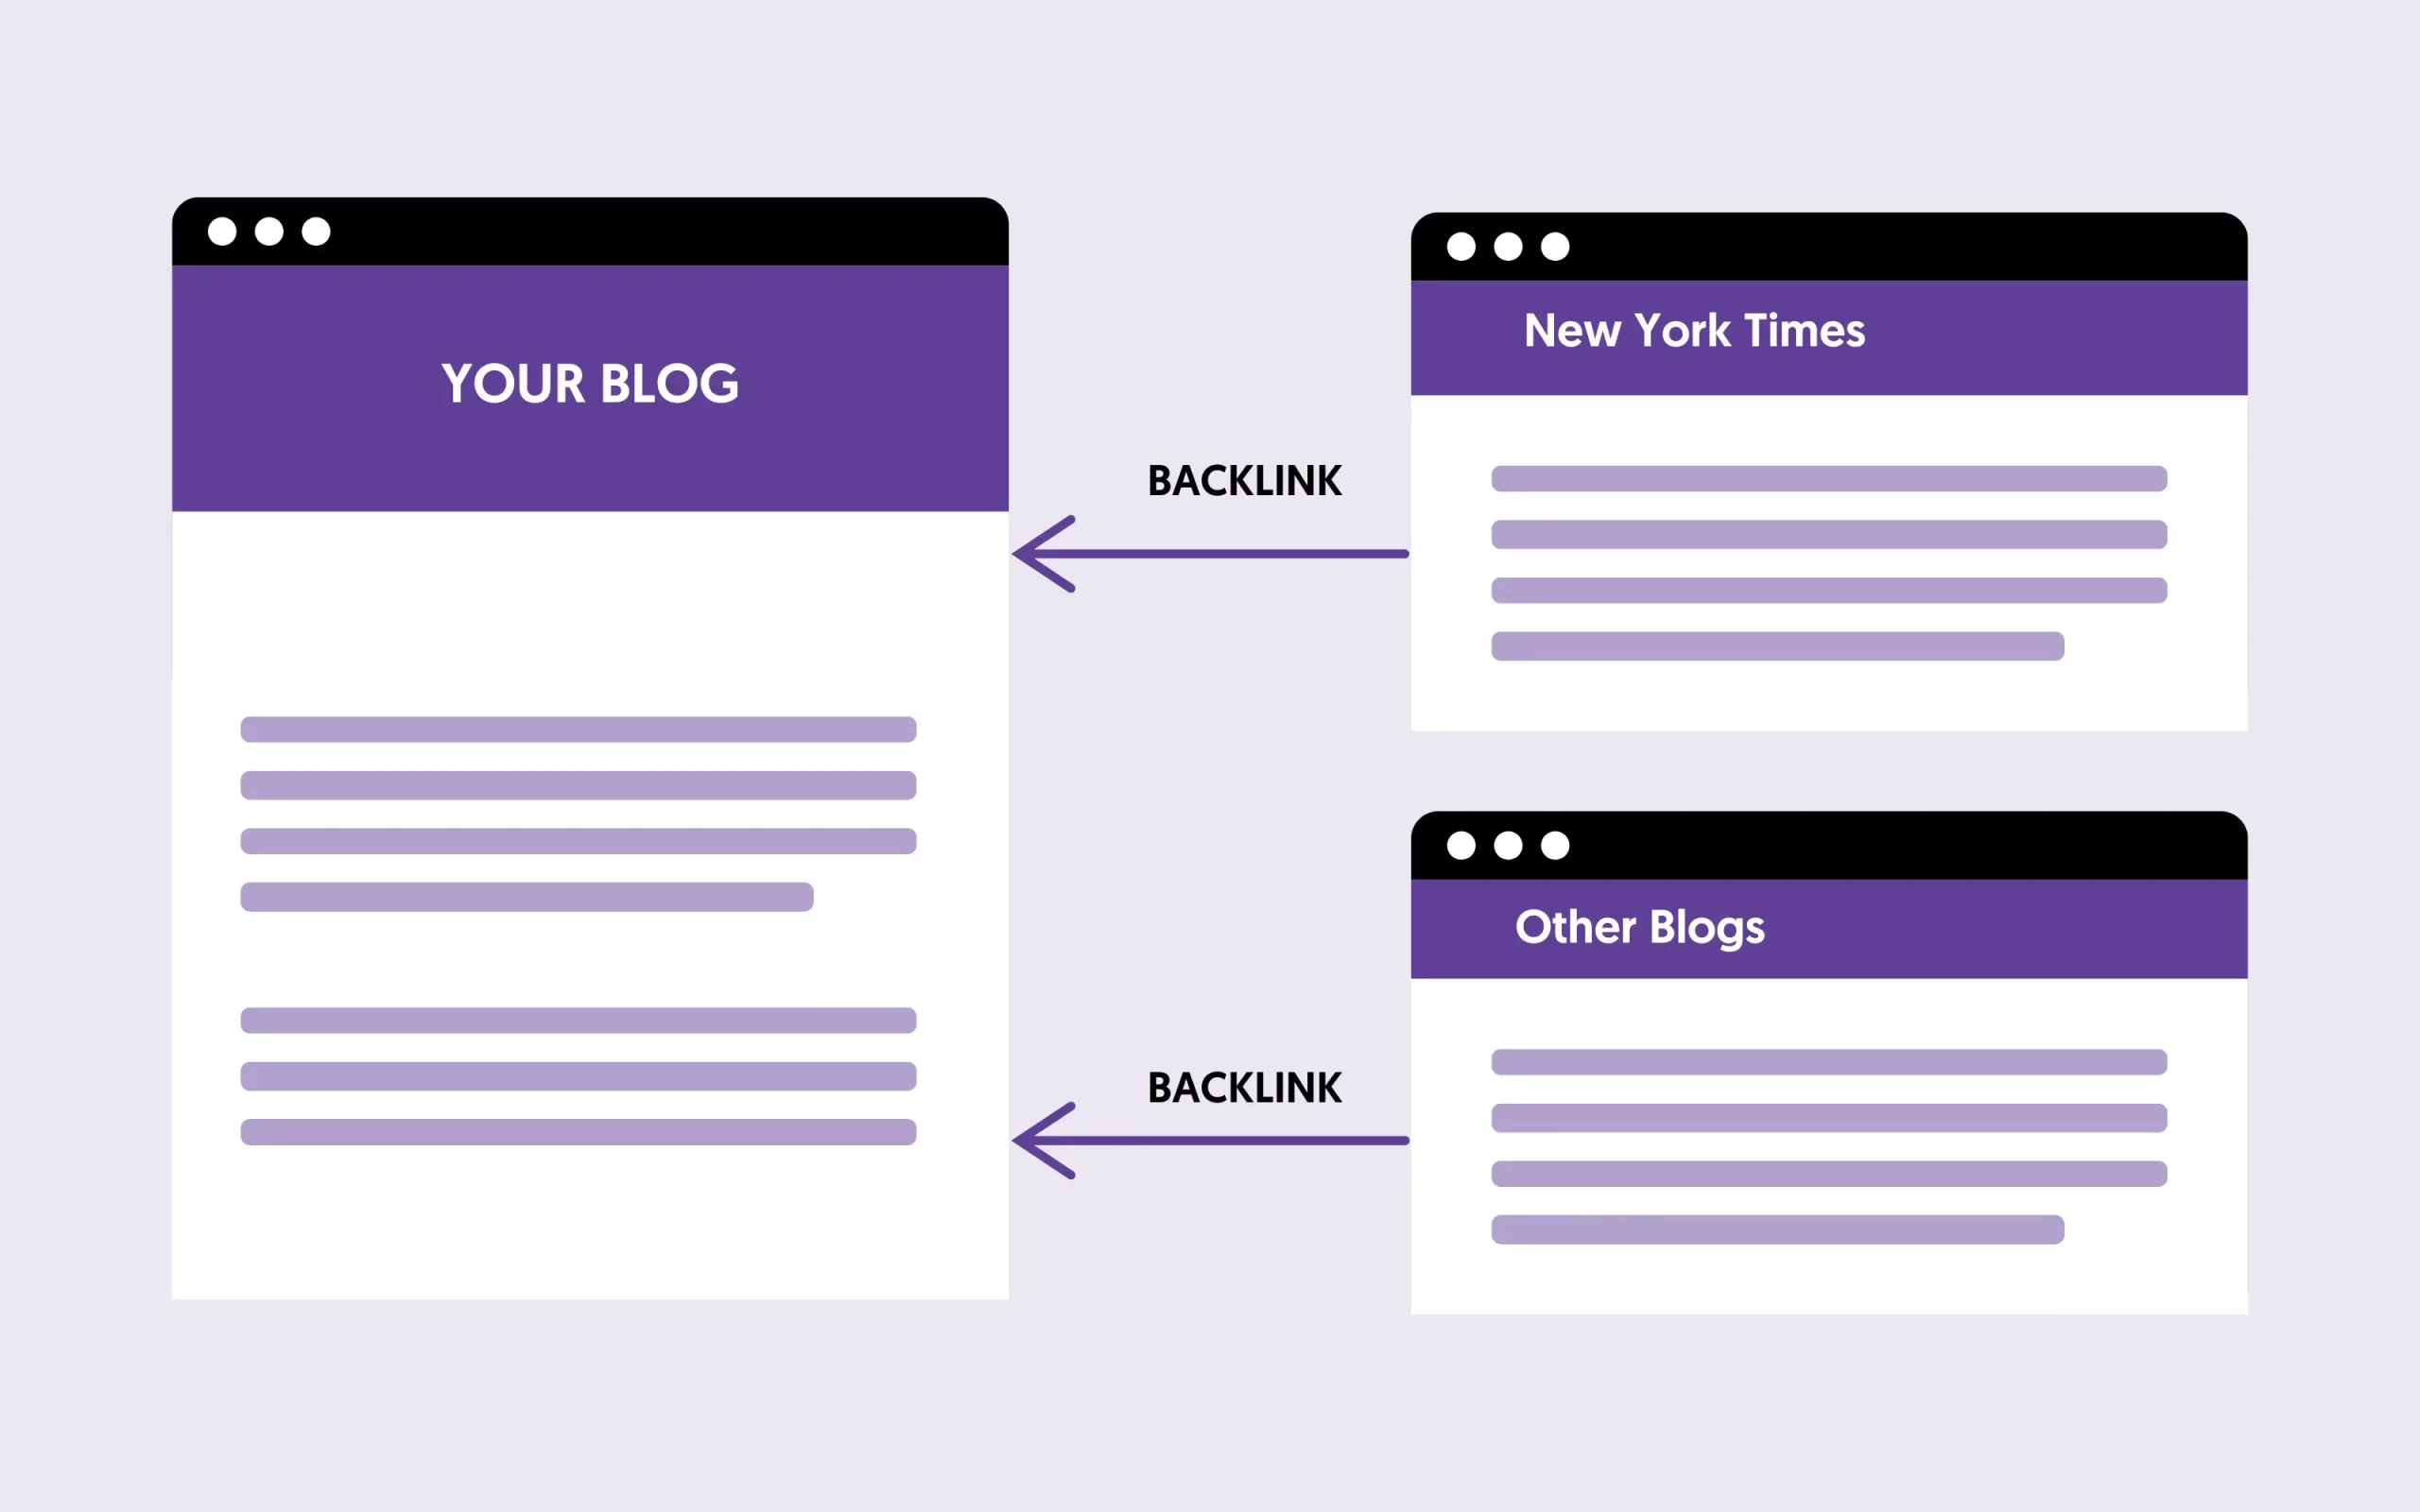
Link building is a complicated topic that beginners to blogging find difficult to understand. I know this from experience and from the feedback I get from my blog readers and clients.
What you should know about link building at this stage is:
- It’s not a matter of quantity, but it’s mostly a matter of quality. This means there is no magic number on how many links you need to get to achieve high rankings, but from where these links are coming.
- Links from websites that have high Google trust are more valuable than links from other low-quality websites.
- If you engage in black hat link-building practices (i.e., buying links, exchanging links with others), you will get into trouble with Google.
- Google’s algorithms will penalize your website for trying to manipulate their algorithms, and as a result, you will lose all your rankings.
To learn more about link building and the different SEO processes that will help you build more traffic to your blog, read the following guides.
Resources to learn more
- How to Write SEO-Friendly Blog Posts - The 10-step process I follow to SEO optimize all my blog posts.
- Best SEO Certifications - a list of courses to become an SEO expert.
- How to Learn SEO - get a learning plan to teach yourself SEO.
- Best Blogging Courses - a list of the best blogging courses (Free and paid) to learn how to blog like a Pro. Highly recommended for beginners to blogging.
4. Build A Community Around Your Blog
Once you have a blog with great content and the traffic starts to flow in, your next step is to build a community around your brand.
A common mistake that beginners make is to skip this step and go directly to the money-making part, but this is not the most efficient way.
Before making any sales (conversions), you first need to gain the user’s trust, and this is achieved through community building.
Notice that I used the term ‘brand’ and not just blog, and this is done on purpose.
At this stage, you need to stop thinking about your blog as a hobby, but you need to change your mindset and approach it like you would approach a ‘real’ business.
We all know that branding is a very important aspect of the success of any business, and your blog is not an exception to this rule. There are many things you can do related to branding (like having a distinct logo, unique slogan, etc.), and community building is one of them.
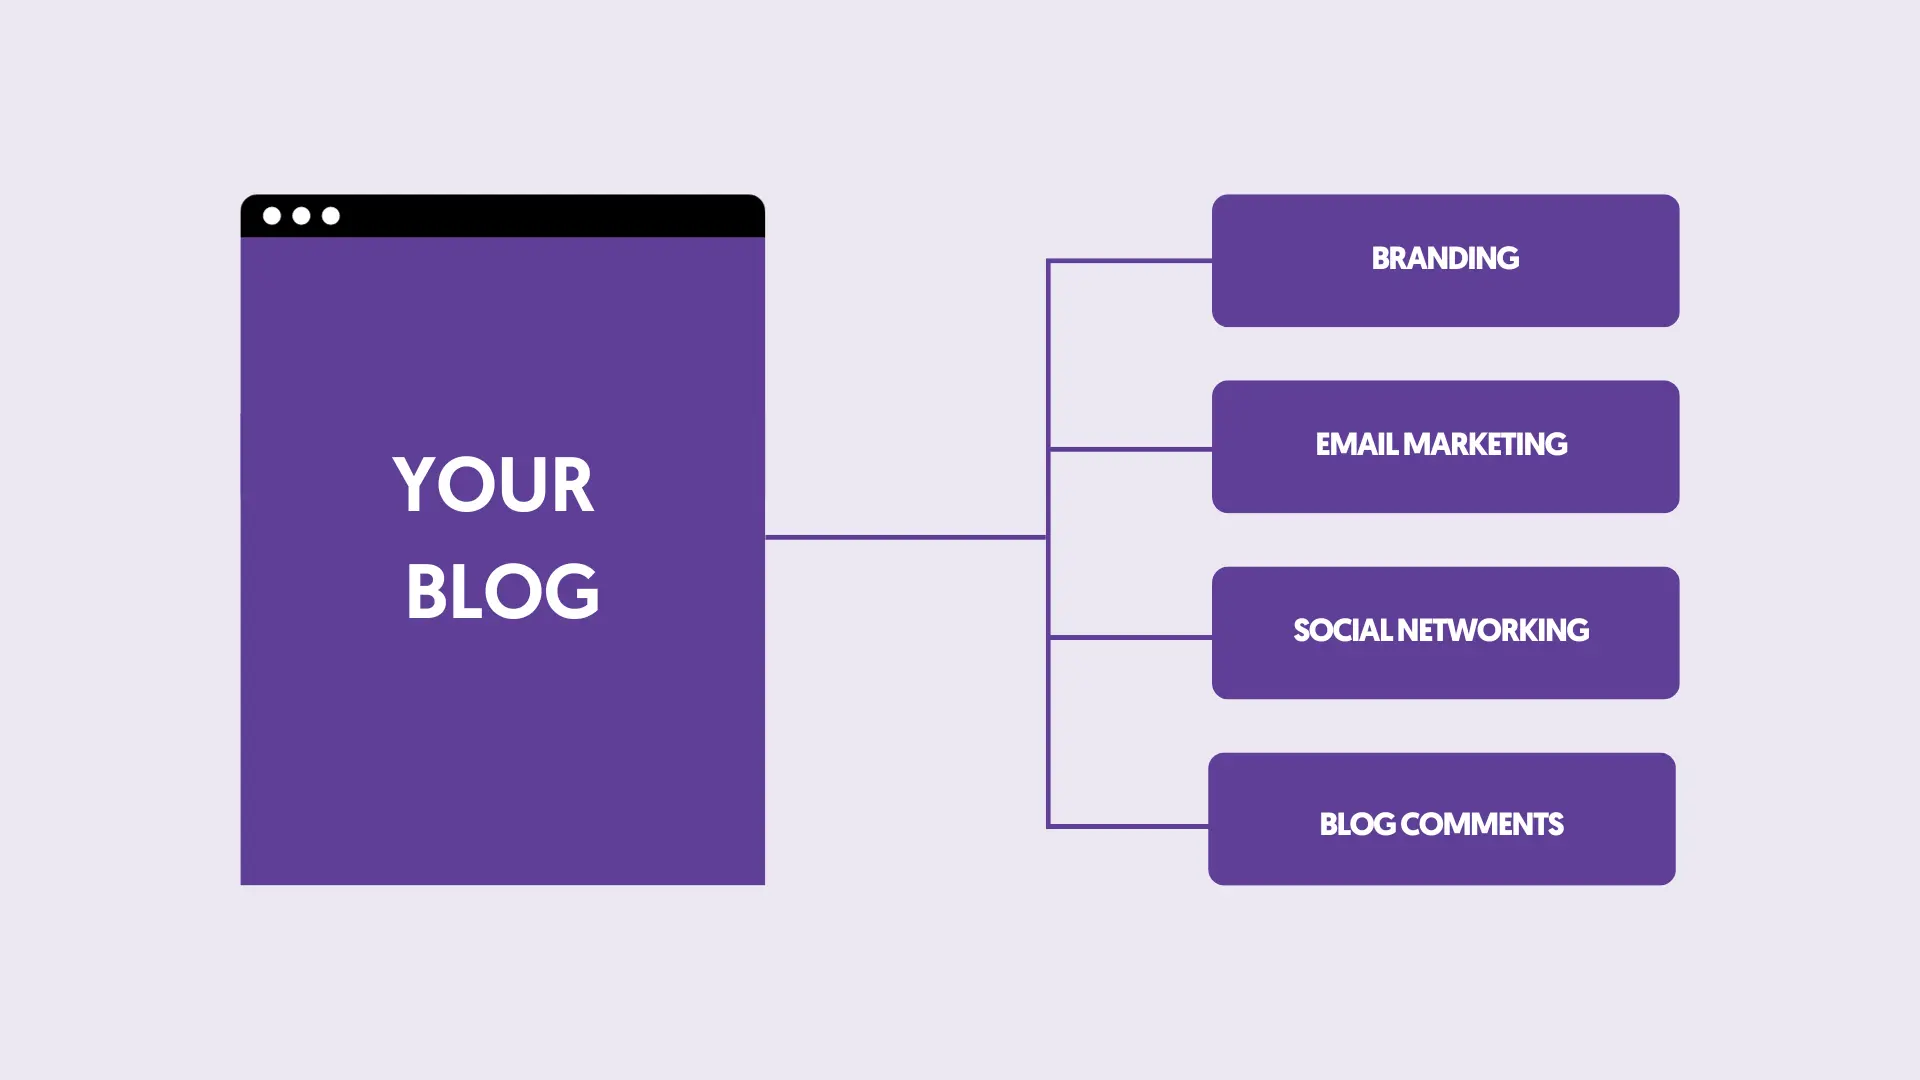
What is community building for a blog?
In simple terms, what you are trying to do is create a community of people who will follow your blog, interact with your content, and buy your products or services. The most common ways to do this is through:
Email marketing
People who subscribe to your email list (aka newsletter) are a valuable asset to your blog. You can use your email list to inform your community when new content is available on your blog, to ask for their feedback, and to sell them products or services.
This will not happen from day one. You first need to gain their trust by providing value through your emails, but at the end of the day, it’s one of the most efficient methods to create a community around your blog.
In my case, 20% of the monthly sales of my digital marketing courses are generated through my email list.
Social media marketing
Some people don’t like to receive emails, they prefer to use social networks to read their news, communicate with their friends, and generally spend a lot of their time online.
You need to ensure that you have a social presence on the same channels as your potential followers.
There are many social media networks available that you can use, but since you are at the beginning of setting up and establishing your blog’s brand, it’s better to concentrate on those channels that are proven to be more effective than others (when it comes to building followers), and these are Facebook and Twitter.
Start by building your fan base on Facebook and also spend 10-15 minutes per day on Twitter.
Remember that your goal is to connect with people who can become potential followers and customers of your blog and not just with anyone who has a social presence. Do some profiling and choose your target audience wisely.
Replying to blog comments
Last but not least, you should not forget about blog commenting. I’m not referring to comments you can write on other blogs but to replying to comments others post on your blog.
If someone writes a comment on one of your articles, they expect to get a reply back, and ignoring them is not good when trying to build a community.
Look at this post as an example. It has more than 80 comments from readers. What I do daily is to try to respond to each of the comments and help my readers in any way I can.
I don’t approve all comments; I only publish comments that make sense (not spam or self-promoting), encouraging more people to post their comments.
5. Start Making Money By Selling Ads
Did you notice how many things you need to do to get to the money-making part? Although this blog post is about making money from your blog, almost ¾ of the content is related to activities that come before that, and this is how blogging for money works in real life.
As a reminder, it is necessary to understand that you will not make money from your blog if:
- You don’t have enough organic traffic.
- You don’t have a decent email list.
- You don’t have a community of loyal followers.
- You don’t have content that converts.
Assuming that you have successfully completed the above tasks, let’s see how you can make money online and reward yourself for the hard work.
Selling Ad Space
One of the easiest ways to make money as a beginner blogger is to sell ad space on your blog. You can register with platforms like Google Adsense, Mediavine, Media, and others. By adding a piece of code to your blog, ads will be added to your content, and you can earn money when your visitors click on them.
The amount of money you can make from ads depends on three things:
- Your organic traffic levels
- Placement of your ads
- The number of available advertisers for your niche.
Let us quickly examine these factors:
Traffic: The more traffic you have, the more money you can make from ads. It’s as simple as that.
Ads Position: To make money from ads, you need people to click on your ads, and the position of your ads on the page is a very important factor.
Although the best way is to test different ad placements and find out which placements work better for you when you put ads in your main content (as opposed to the sidebar and footer), you can expect higher click-through rates (CTR), which means more earnings.
Competition: Most ad networks are keyword-based auction-type systems. When a user is searching on Google and then visits a website that has ads, the ads platform will try and show the user ads that are relevant to the search query.
If there is a lot of competition, i.e., many related ads, then this increases the money the advertiser will pay and the money you earn.
When is it best to monetize your blog with ads?
- Use ads on websites that cover many topics (news portals, magazines, newspapers, forums, etc.).
- Use ads on websites in the healthy living niche (fitness blogs, healthy living, etc).
- Use ads on websites that receive thousands of page views.
When not to use ads?
- Don’t use ads when you can sell your products or services.
- Don’t use ads when you can make money through affiliate marketing.
6. Make Money By Selling Your Own Products Or Services
I mentioned above that I don’t use ads on this blog. The reason is simple. The purpose of this blog is not to make money from advertising, but it’s the channel I use to promote my Digital Marketing Courses and services.
Think about it this way: When you sell ad space on your blog, what happens? You only get a portion of the money since a significant amount goes to the middleman (advertising platform), and the advertiser makes a high profit from your content and hard work.
To minimize the money loss, you should consider creating and selling your digital products or services.
Of course, this is not as easy as it sounds. It requires a lot of effort and hard work to create products that others will be willing to pay money for, BUT it’s the best way to build a long-lasting online business.
Having your own products will maximize your profit, and you know that every effort you make to get more traffic will make you more sales.
The easiest types of products to create and sell online through your blog are ebooks and online courses.
Before spending time and money to create a digital product, you should do some homework. To be more specific, you need to answer these 4 questions:
- What type of product to create?
- Who can potentially buy your product?
- How much to sell it?
- How do you test if your product idea works?
To answer the first three questions, you need to do your research and find out what is already available in the market, who sells it, and how much they sell it.
But even if you have this data available, the most important is to know if your idea for a product will sell before you make the product, and this is what I will explain below.
When I thought of selling an online course through my blog, I was unsure if my readers (and community) would be willing to purchase.
So, what I did to test my idea was the following:
- I created a sales page for my course (that is similar to the one you see now).
- I added banners (call-to-action boxes) in my articles and sidebar to redirect traffic to that page.
- I monitored the number of clicks on the 'buy now' button (the button did nothing but redirect users to an error page).
I know that this is not the best user experience, but it helped me answer a lot of questions and gave me the energy and power to create my first online course.
The bottom line is this: Do your research, find an idea, and test it. If the test is successful, proceed to the implementation. If not, start the process again.
Resources to learn more
- How To Make Money With Digital Marketing - 12 proven ways to make money online through digital marketing.
- How To Make Money Online With SEO - earn more by utilizing your SEO expertise.
7. Make Money Through Affiliate Marketing
Another way to make money from your blog is by selling other people’s products (digital or physical) for a commission.
This is generally known as affiliate marketing. Here is an overview of the process.
- You find which products you want to promote
- You enroll in their affiliate marketing program, and you get a unique link and banners to use
- You add the links/banners to your blog.
- When someone clicks on the links, they are redirected to the provider's website.
- When they make a purchase, you get the agreed commission
It sounds good, right?
Well, is not as easy as it sounds. You still need to find the right products to promote, and you still need to test if your readers and community are willing to pay money to buy the products you suggest.
Some things to know before getting into affiliate marketing:
- Don’t promote products or services you don’t personally use. You don’t want to lose your user’s trust. Only promote products you know from personal experience that will help your readers.
- Google does not like websites or web pages whose sole purpose is to make money from affiliate marketing. Your website should provide real value to the user, without being too promotional.
- Don’t overdo it. It’s okay to suggest products in your blog’s content, but not always. Good affiliate marketers don’t promote products all the time. They first provide value to their readers and then suggest products.
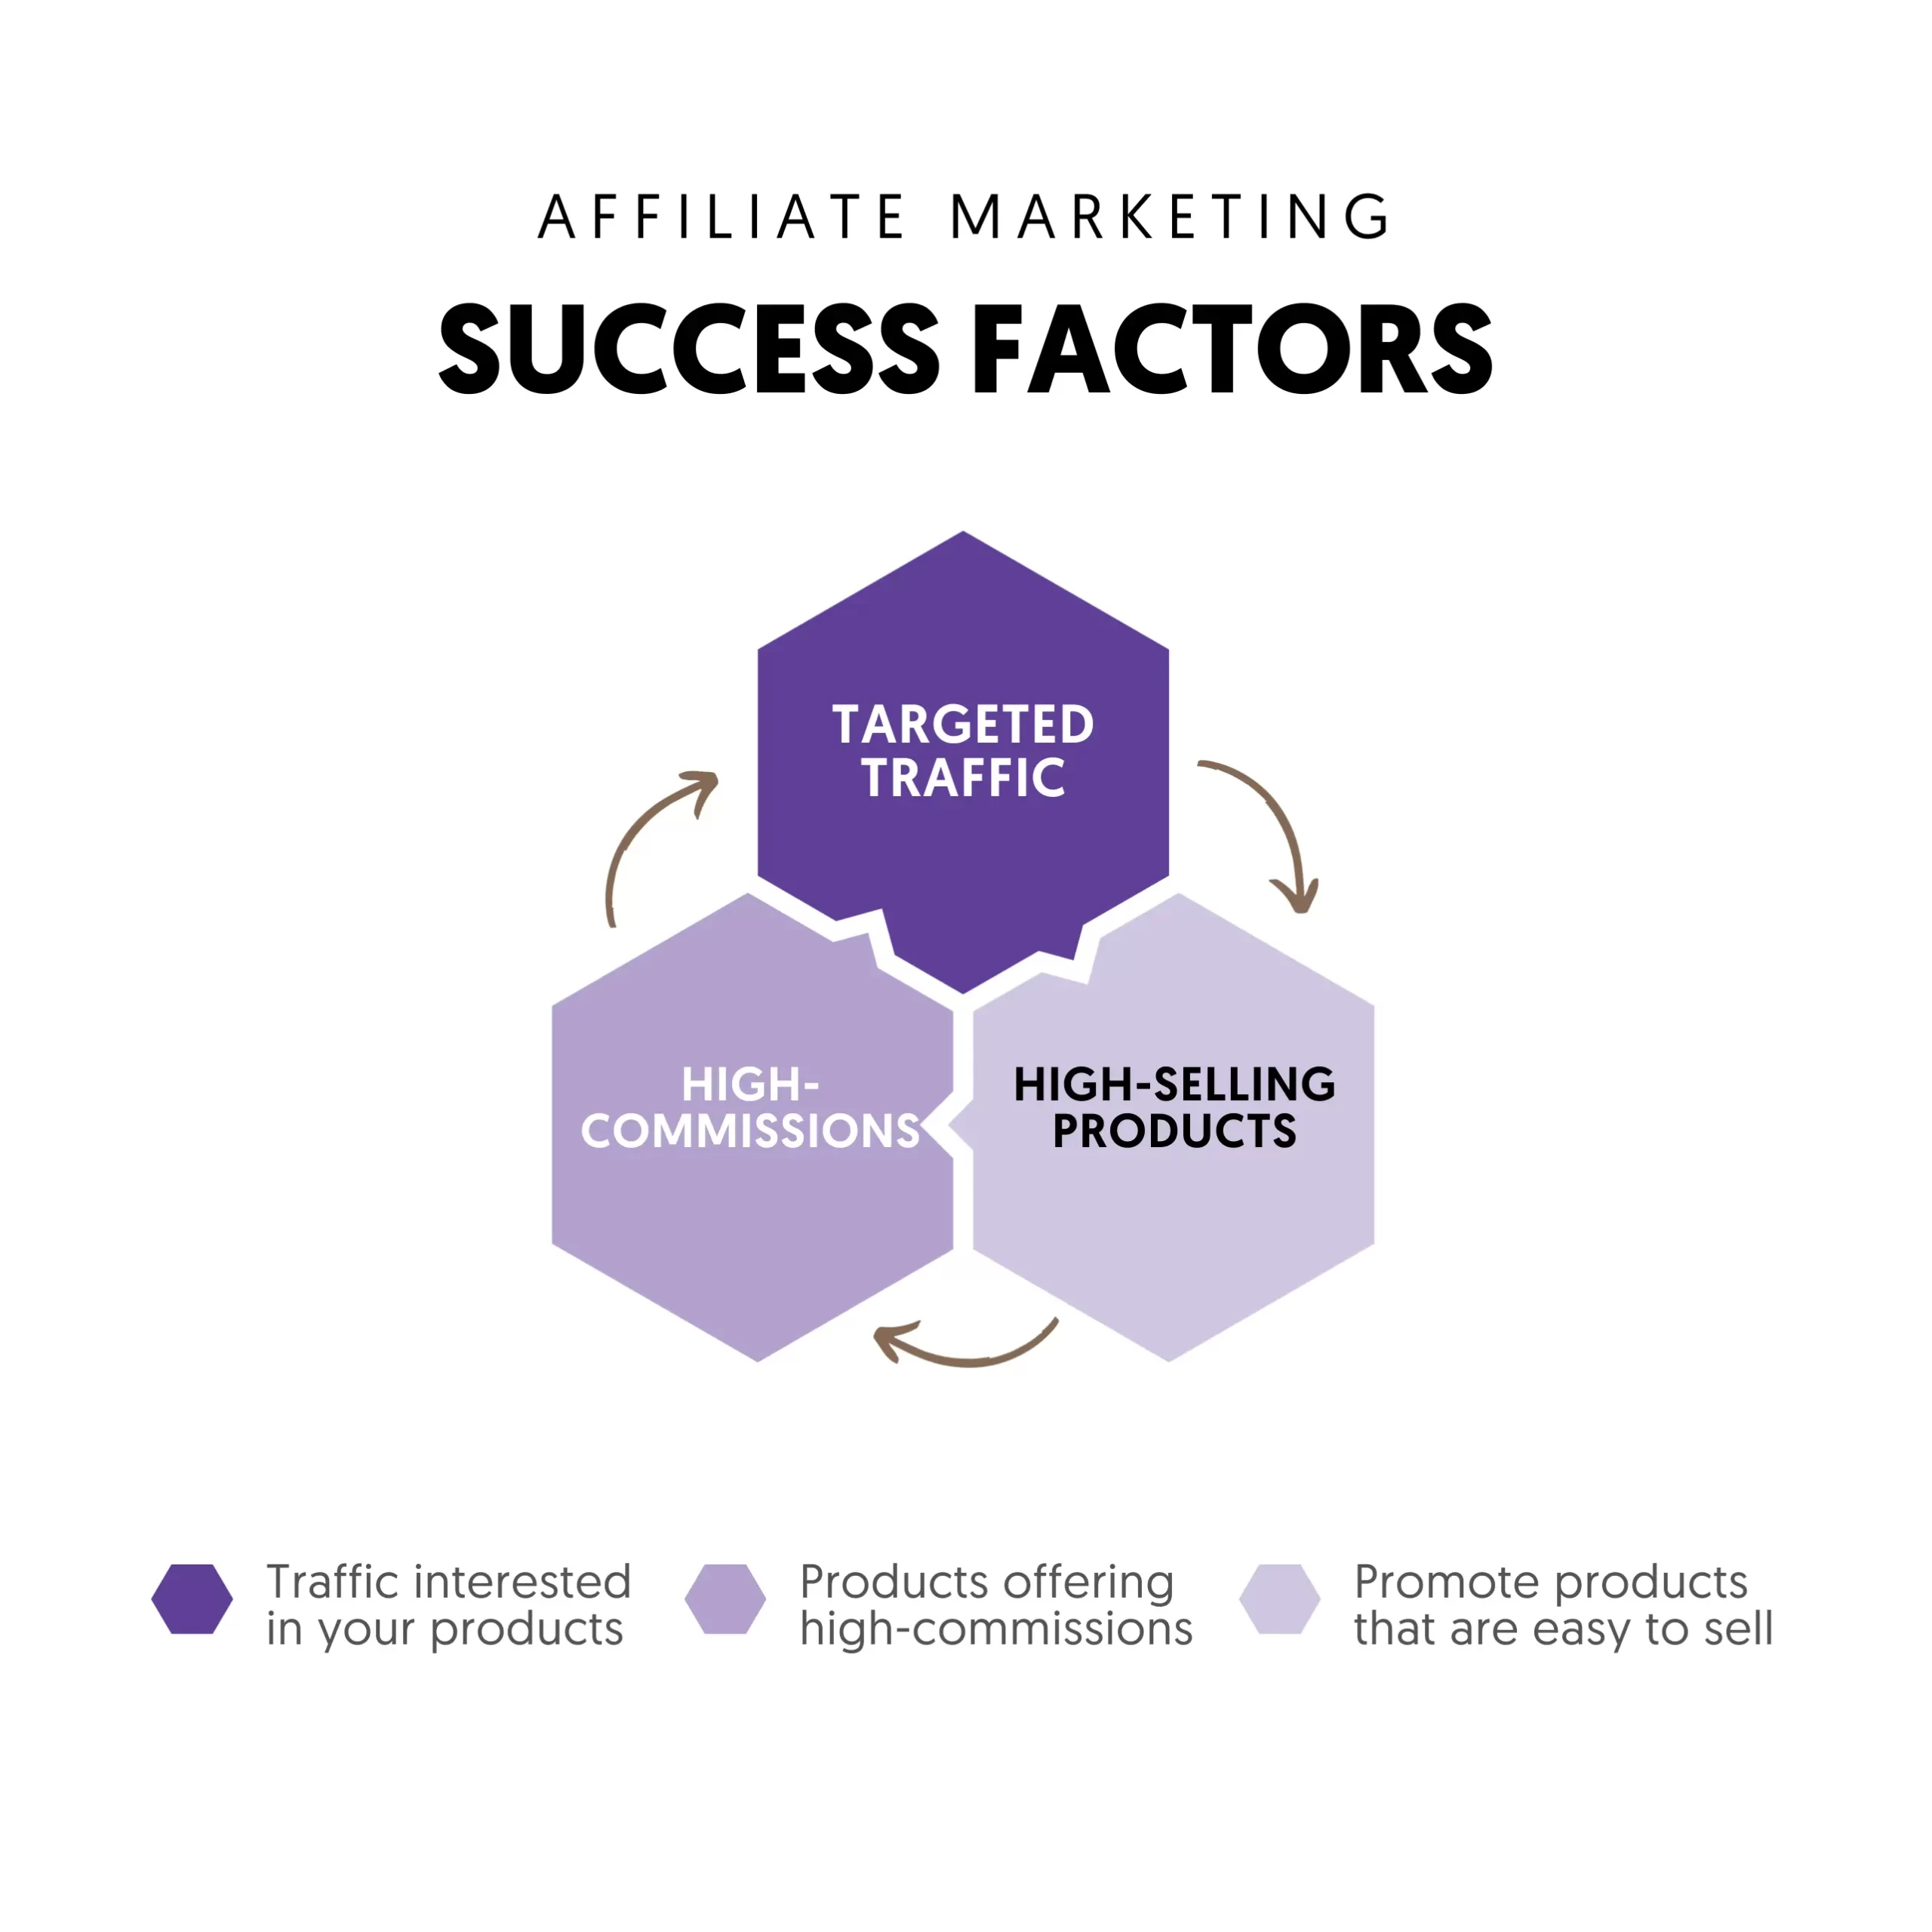
- To make real money with your blog, promote products that offer a high commission and are easy to sell.
Resources to learn more
- Best Affiliate Marketing Courses - online courses to learn the secrets of affiliate marketing.
- Digital Marketing Certificate Programs - certificate courses to learn how to use digital marketing to increase your blog's sales and conversions.
Conclusion
Thousands of bloggers are making money through their blogs either by selling ad space, their own products/services, or through affiliate marketing.
All these successful bloggers have some things in common:
- They have blogs with great content.
- They have managed to build communities around their blogs.
- They use more than one way to make money. They have their own products, but they also make money from affiliate marketing and selling ad space.
- They have been blogging for years, and it took them several years to get to the point of making a living from their blogs.
If you have made it to this point, I will let you go with this:
Everyone can learn how to start a blog and make money. The amount of money you will make depends on how much work you are willing to allocate to make it happen.
It’s not an easy job, and it’s not something that will generate results in a few months or even years. It will take time, and it needs a LOT of patience. But, as I mentioned above, once it happens, it’s one of the best jobs in the World!
