To promote your business on Facebook, you need to create a business page. Fortunately, the process is easy and straightforward, and it only takes a few minutes to complete.
To set up a page for your business on Facebook, you’ll need a logo, a cover image, and a brief description of your company. These are the minimum requirements to establish your business presence.
Once your page is up and running, you can add more information and images to introduce your brand to Facebook users.
In this tutorial, you’ll learn how to make a Facebook business page step-by-step and what to do once you’ve created a page.
What is a Facebook Business Page?
A Facebook business page allows businesses, brands, organizations, and public figures to share content and connect with people on Facebook.
Businesses can publish their stories, showcase their products, communicate with their customers on Messenger, and run events and advertising campaigns.
Facebook users can follow a business page to receive updates. They can also comment and like posts as they do on personal pages.

Business page administrators can use the business profile to follow other pages, comment, share, and like Facebook posts.
Other notable features of business pages include the ‘Call to Action’ button, which is displayed below the cover image and is always visible as users scroll through the page.
Another feature is the ability to verify the business address and domain, something particularly beneficial for local businesses.
Does a Facebook business page have to be linked to a personal account?
Yes, in order to create a Facebook business page, you need a personal account on Facebook. Your account or details are not visible on the business page.
How To Create a Business Page On Facebook
- Create a new page
- Provide a name for your page
- Choose page categories
- Provide a page description
- Add page logo and cover image
- Customize the call to action button
- Claim your unique username (Page URL)
- Edit page info
- Review page settings
- Publish your first post
1. Create a new page
First, log in to your personal Facebook account and select Pages from the left menu.
Click the “+Create New Page” button.
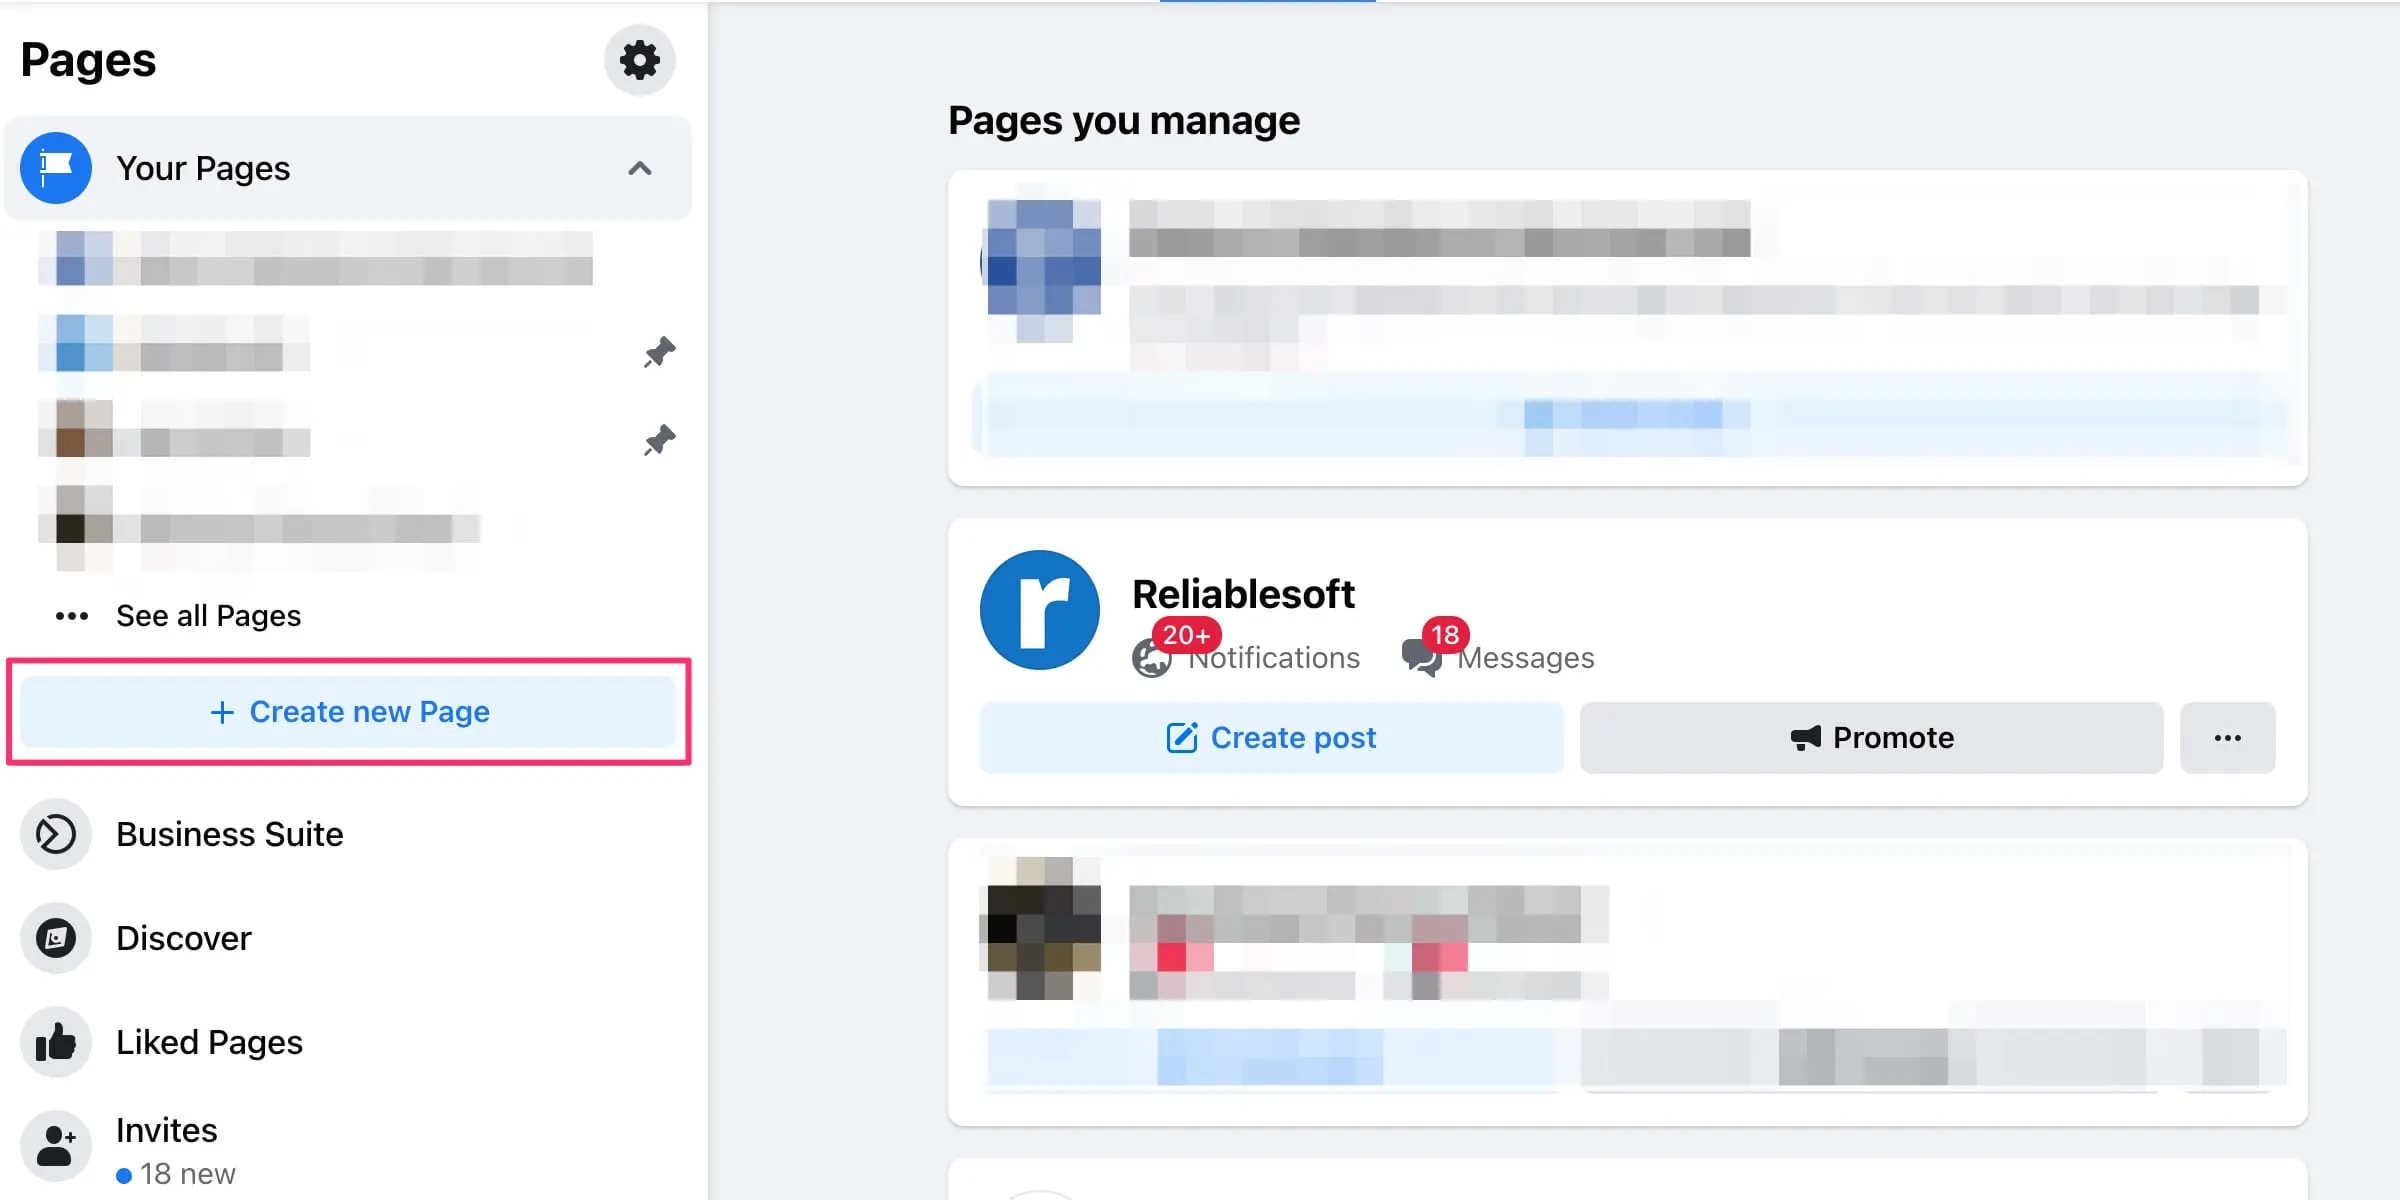
If you can’t find this option, click here to go directly to the Create a new page wizard.
2. Provide a name for your page
The next step is to provide a name for your page. This name will appear on your business profile, browser window, and when commenting or using the page to communicate with users.
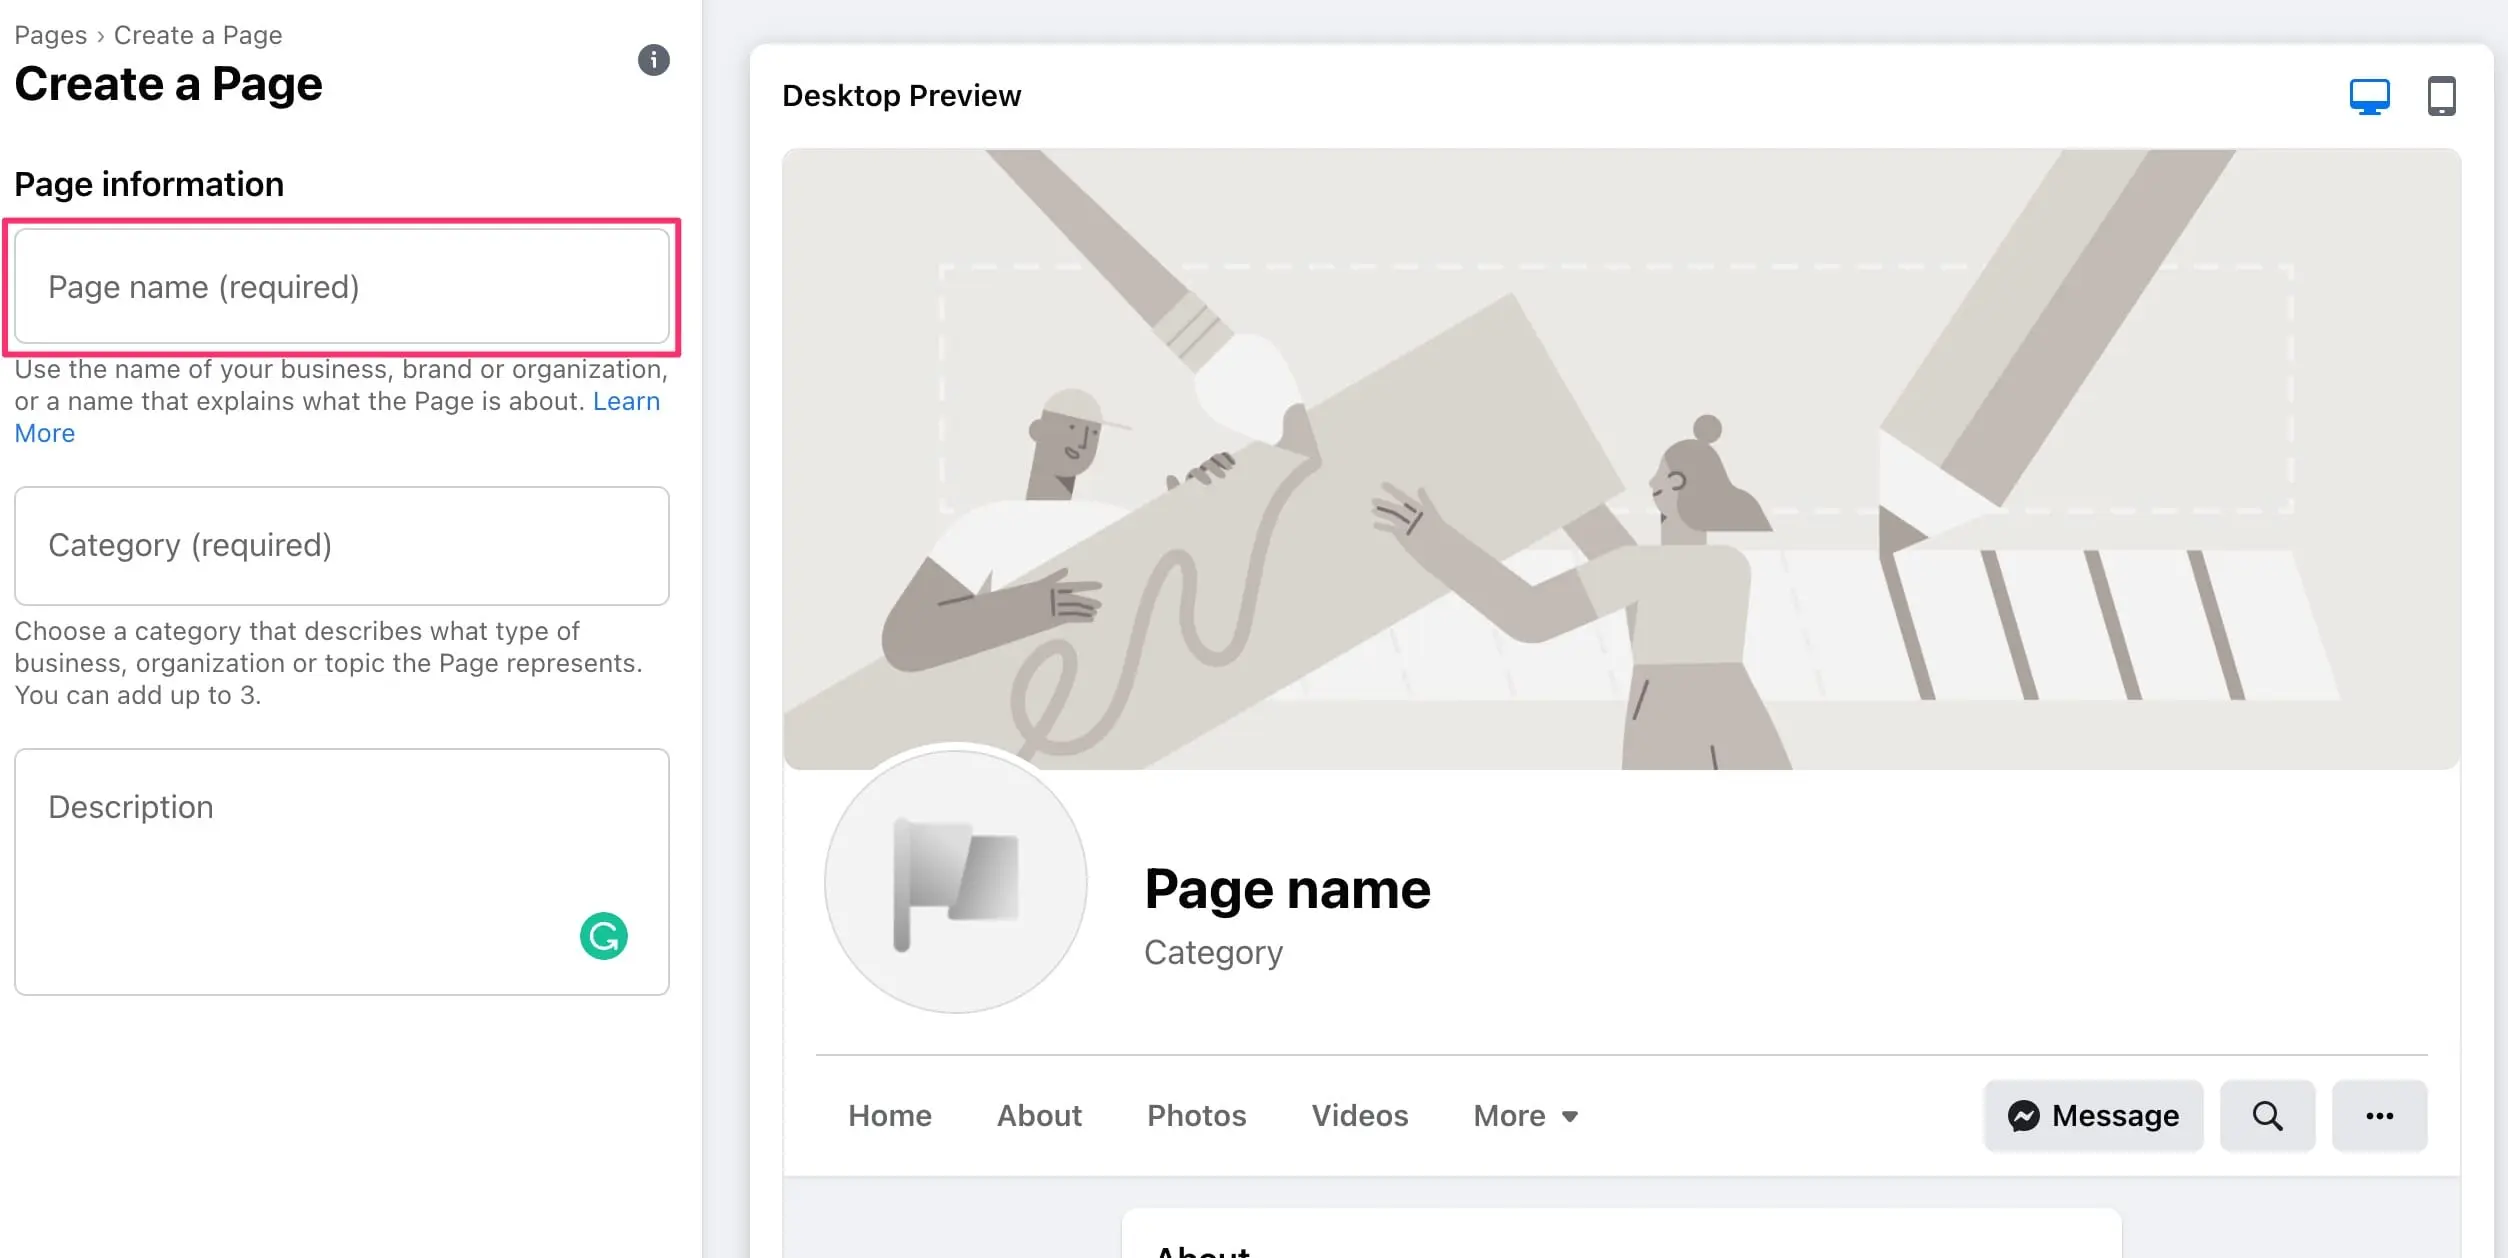
When choosing a name for your business page, you should note the following:
- Your page name must accurately define what the page is all about. It’s your brand’s identity on Facebook, so choose wisely. In the majority of cases, the name of the page should be the name of your business or organization.
- Don’t use a brand name that belongs to another company. Only official representatives of a brand can do that.
- Don’t use all capitals. This is against Facebook guidelines.
3. Choose page categories
The next step is to choose one or more categories (up to 3) that describe your type of business or the page's main topic.
To see which categories are available, start typing words related to your business.
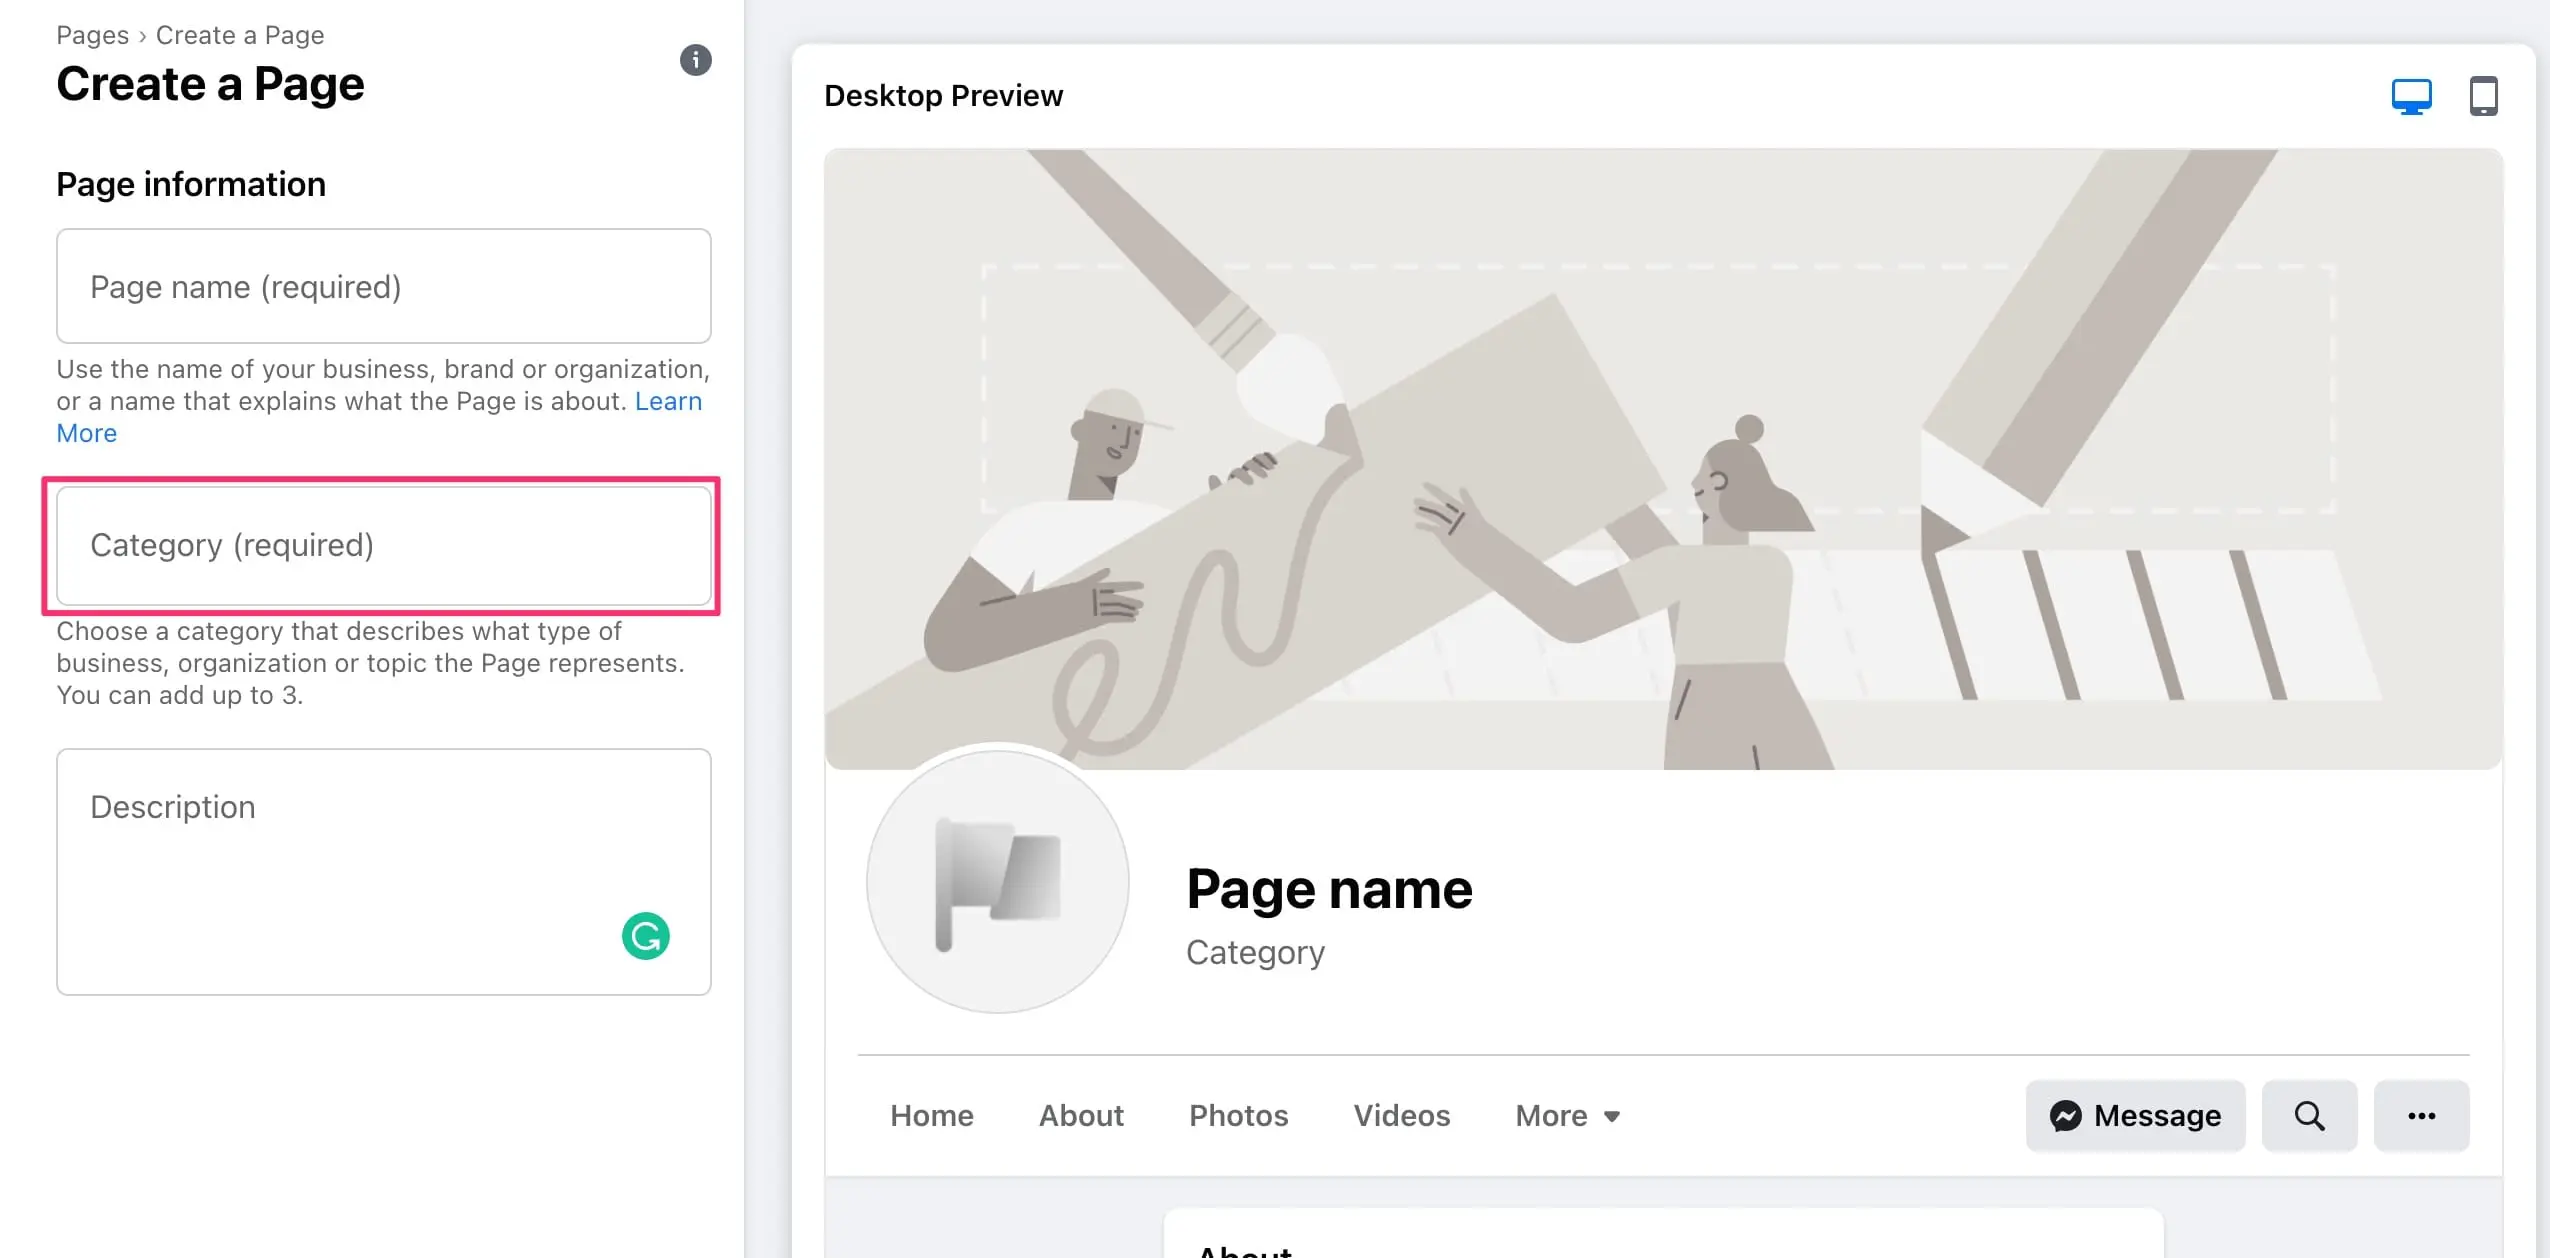
Choosing a relevant category is important for increasing your Facebook visibility. Facebook uses this info to show your page and updates to an audience interested in topics related to your page’s categories.
The first category you choose will be shown on your page (below the page name), so make sure it’s the most accurate.
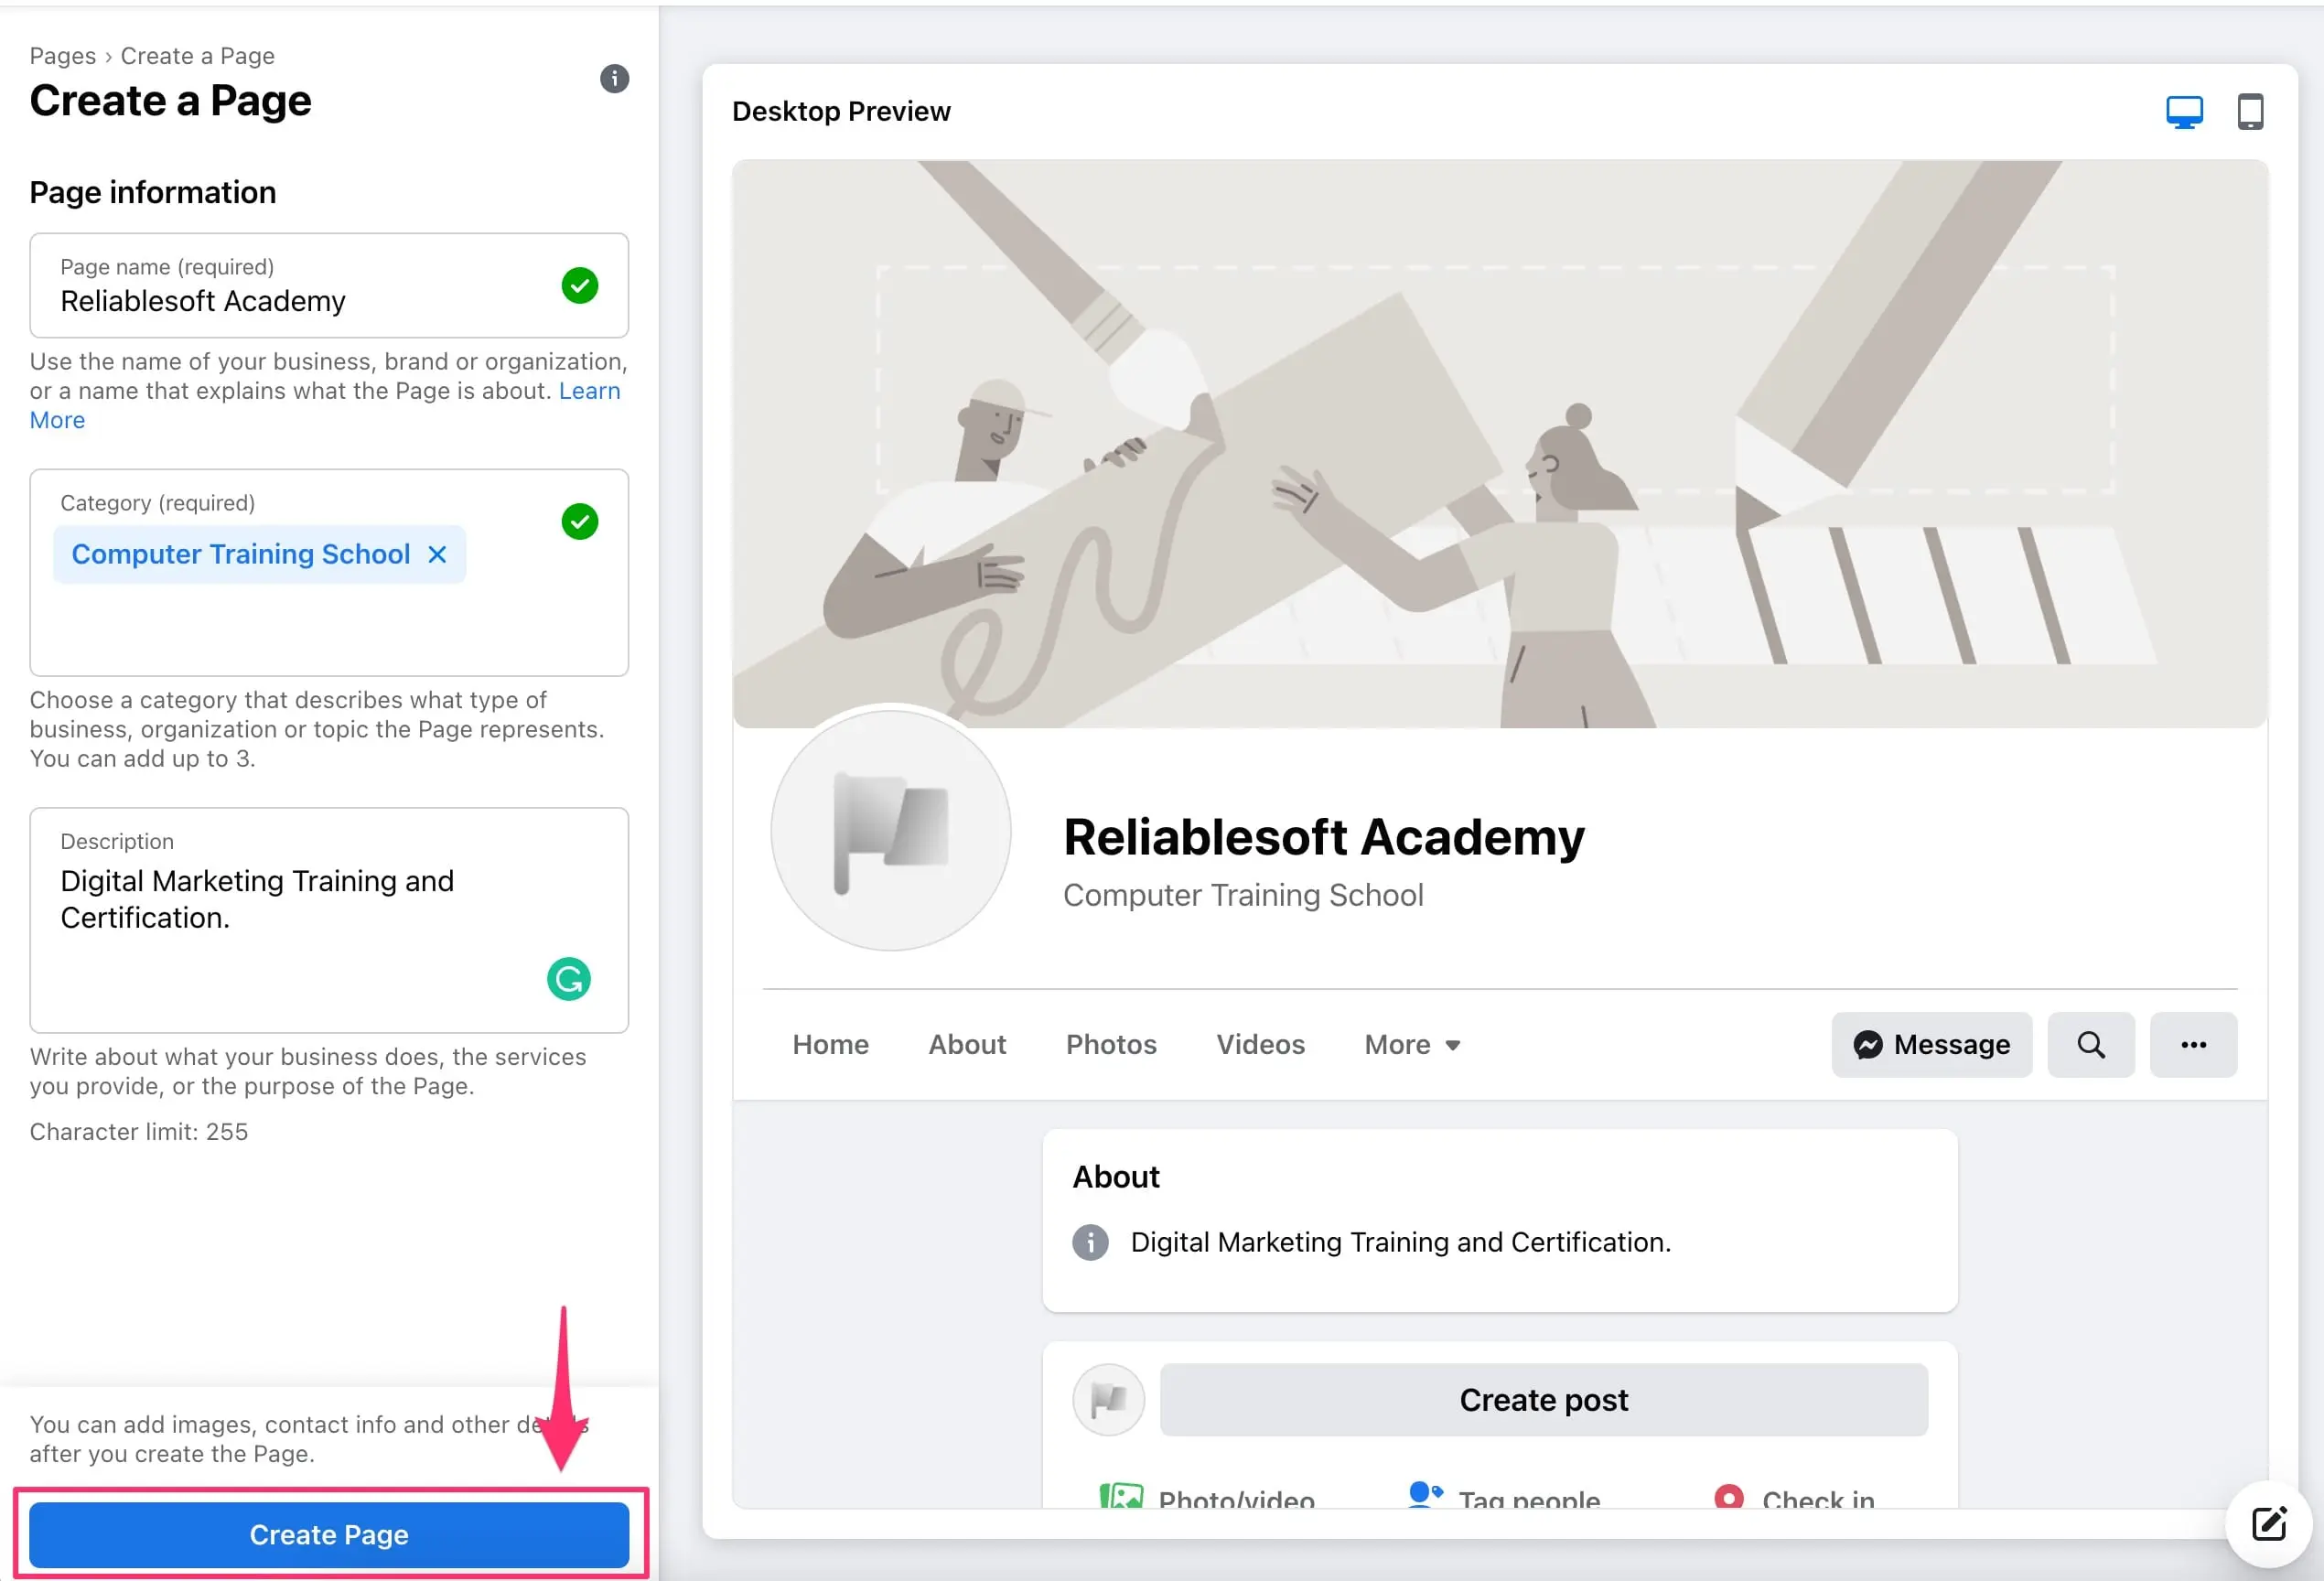
4. Provide a page description
Describe what your page is about in 255 characters or less. Tell users what your business does and what services you’re offering. The page description is shown by default on the left sidebar when users view your page.

When you’re done, click the “Create Page” button to create your page and proceed to the next steps.
5. Add page logo and cover image
The next step is to add a logo (profile image) and a cover image.
To add a logo:
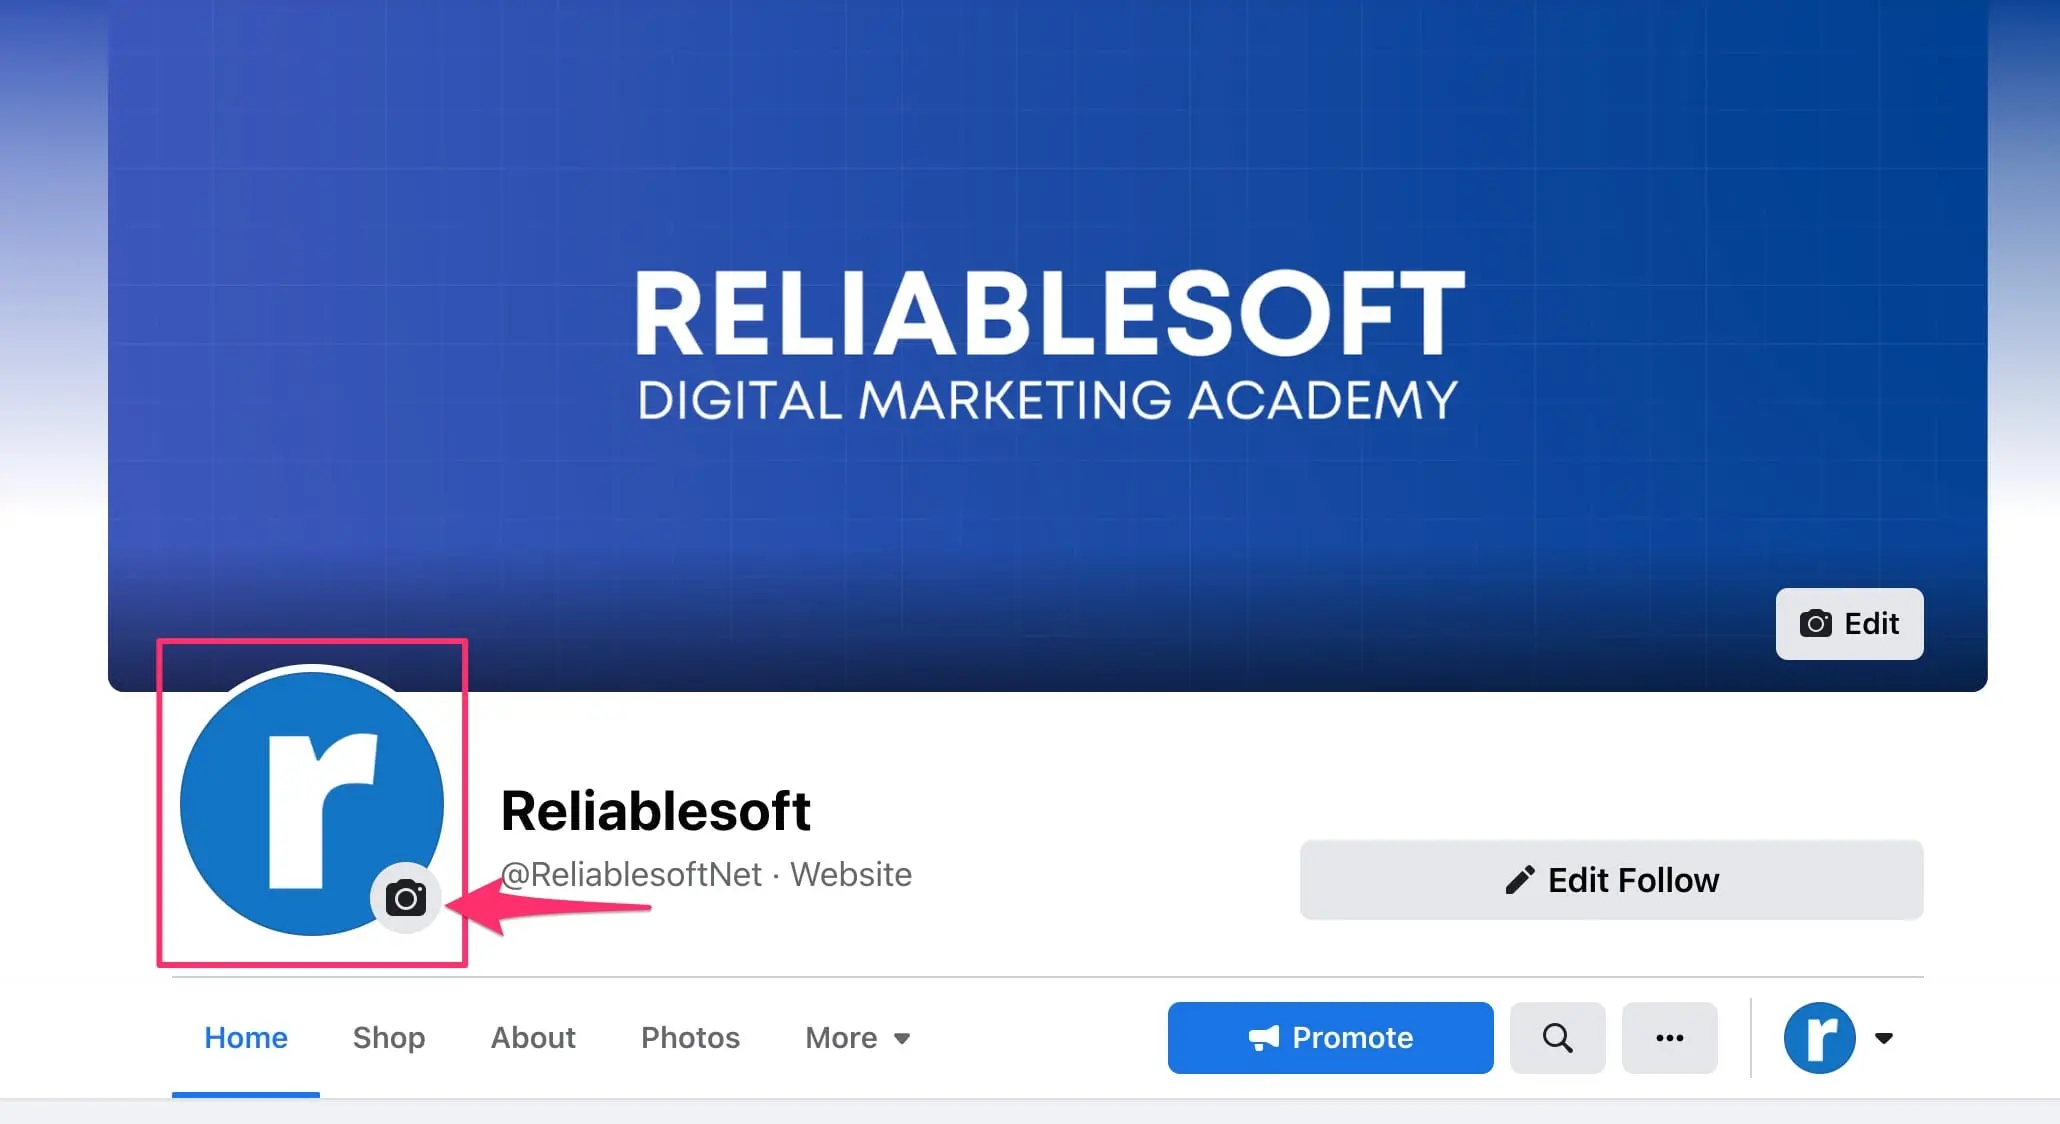
Click the Photo icon above and upload your profile image.
- Your profile image should be square with a minimum size of 180x180 pixels.
- Facebook will automatically crop the image to a circular shape when viewed in the user’s timeline, so make sure that there is enough space around it.
- For better results, you can upload an image that is 360x360 or 520x520 pixels.
- It will show at 170x170 pixels on computers, and on mobiles, 128x128.
To add a cover photo:
Click the Edit icon.
- The minimum size is 400x150 pixels, but for best results, use an image that is at least 820x312.
- For better resolution, use 1640 x 614 pixels
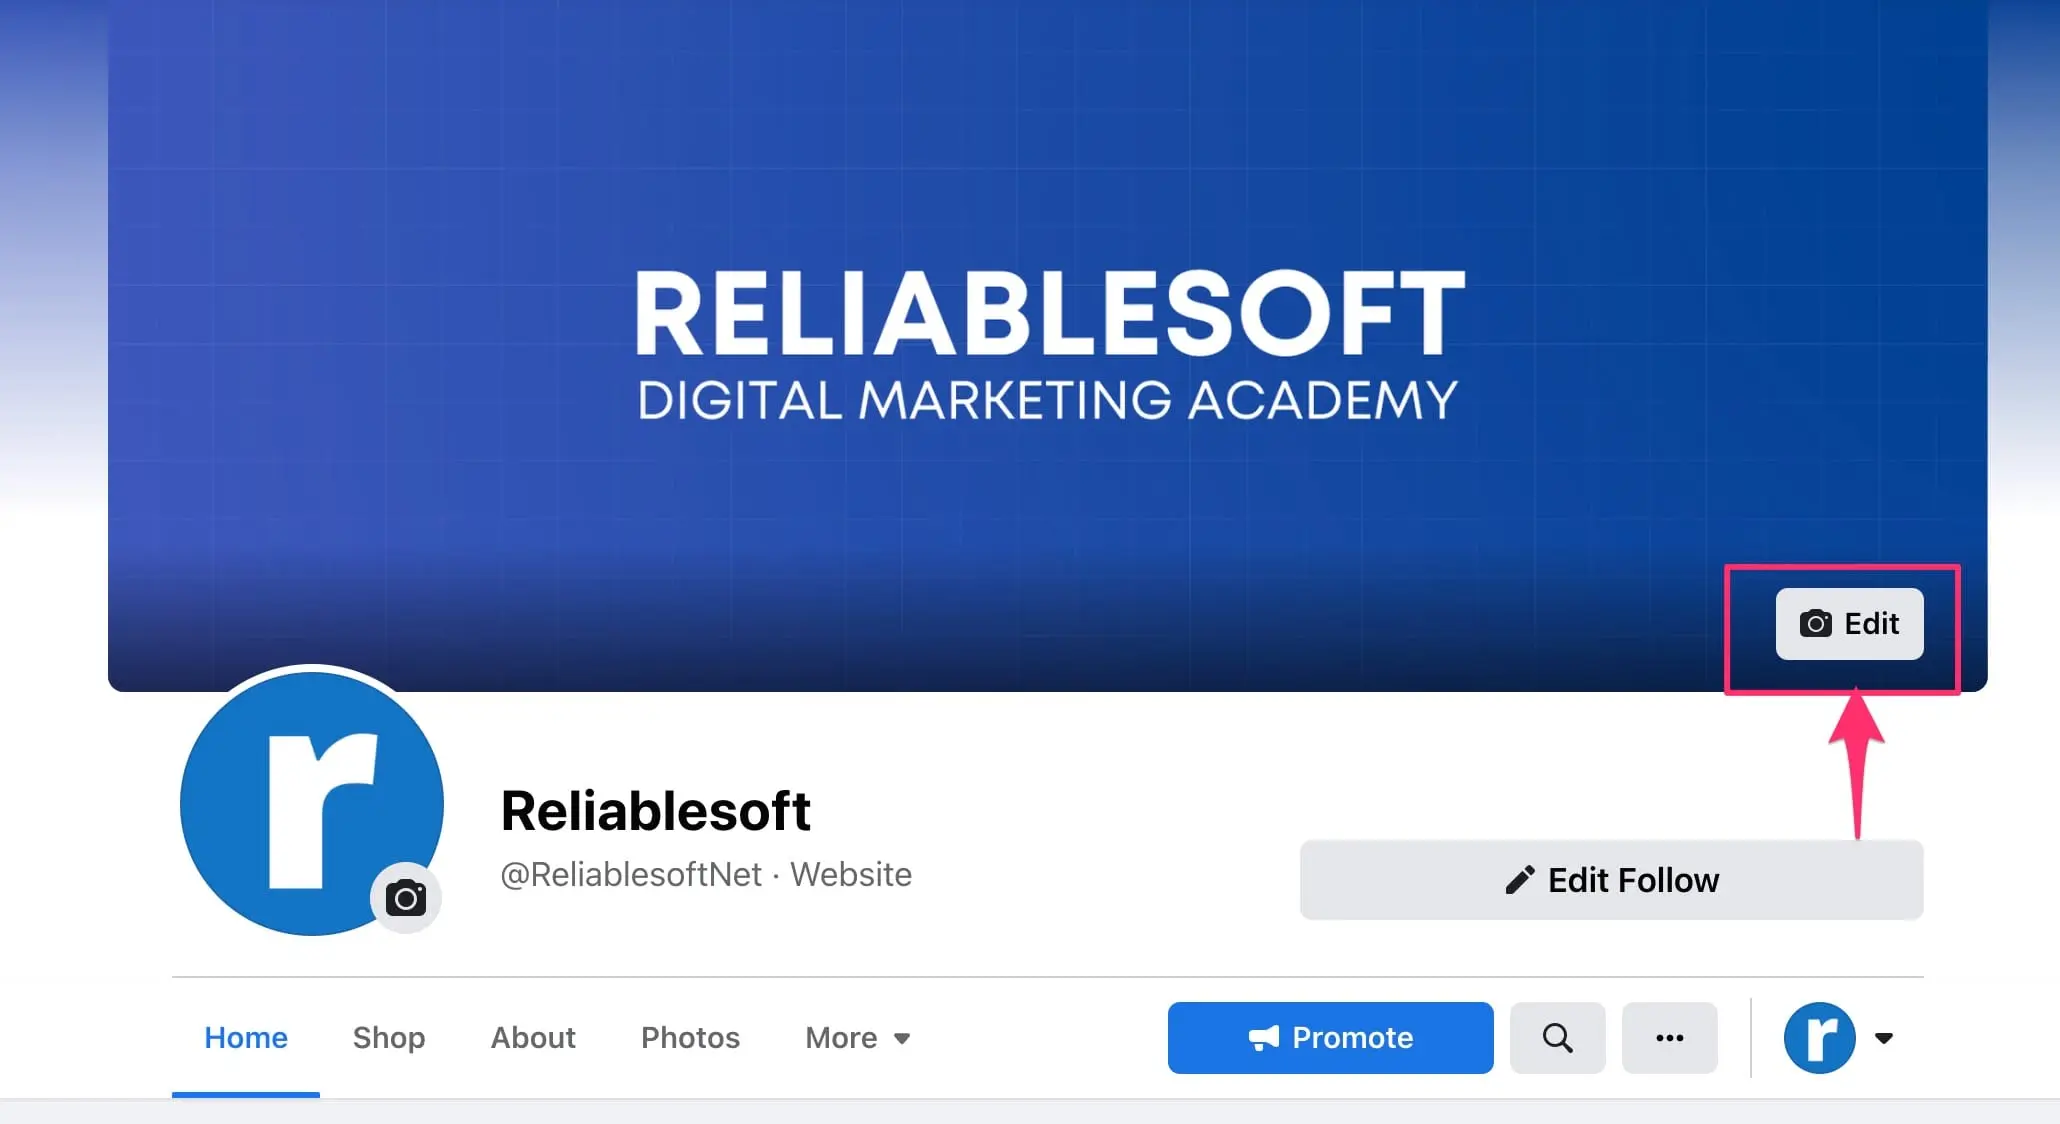
6. Customize the call to action button
The next step is to customize the call to action button. This is shown below the cover image and remains visible as users scroll through the page.
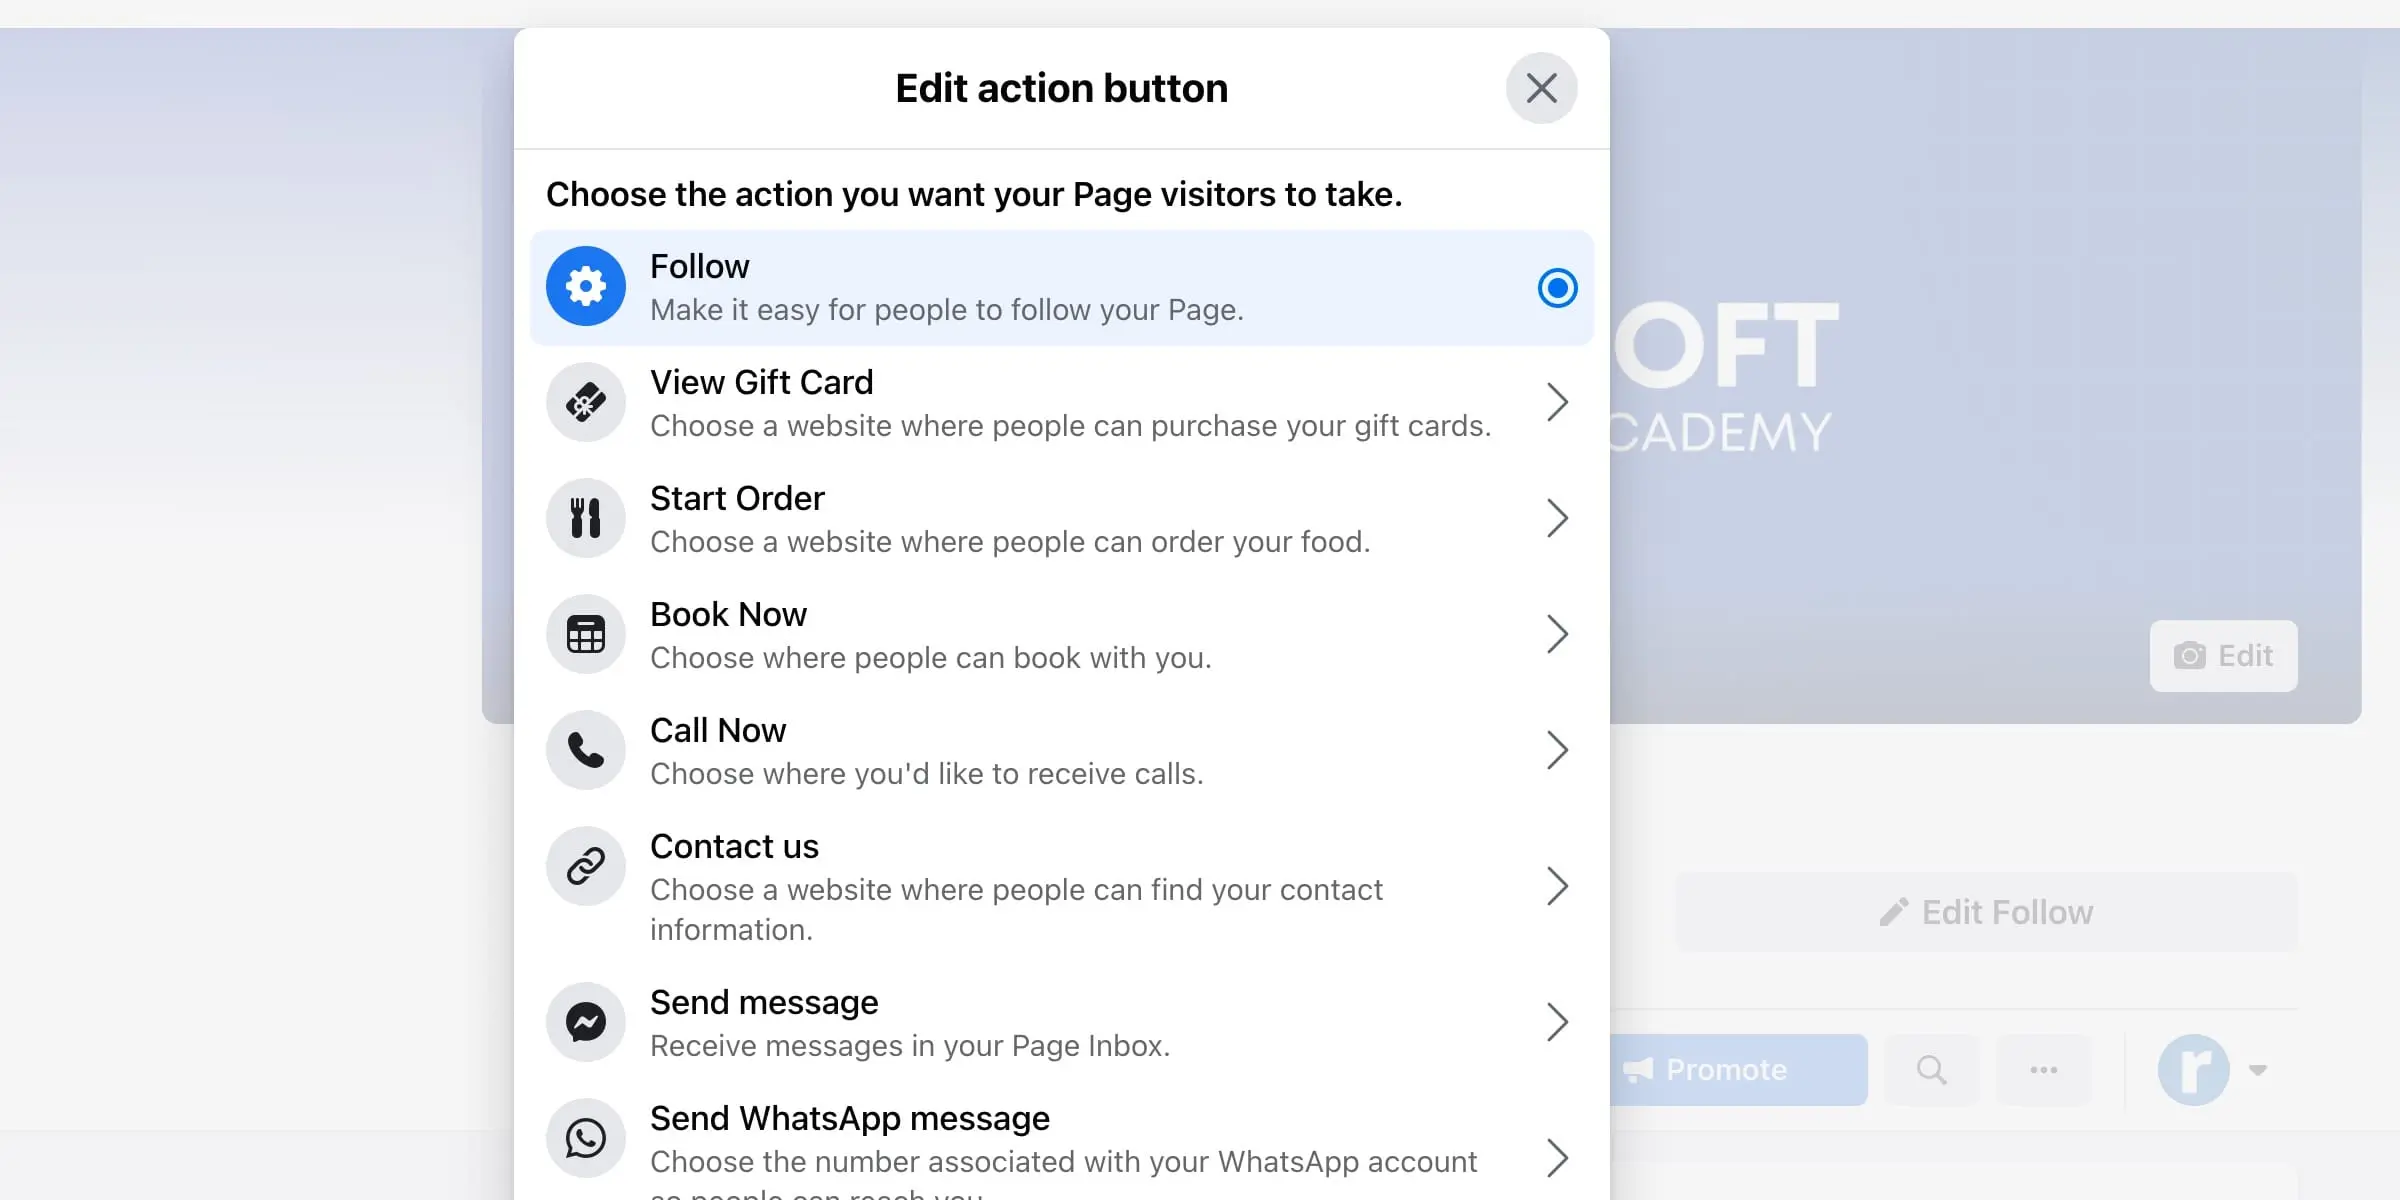
Click the “Edit Action Button” and choose one of the available options.
7. Claim your unique username (Page URL)
One of the most critical steps when creating a business page on Facebook is to claim your unique username.
Your Page's username appears below your page's name and in the page's URL.
When creating your page for the first time, Facebook will assign a random username that is not easy to remember and does not help people find your page. By customizing your username, people can find your business but not its name.
For example, our Facebook username is reliablesoftnet, and our page URL is facebook.com/reliablesoftnet. This is friendly, easy to remember, and matches our domain name.
To change your username, click the “Edit Page Info” button from the left menu and then click the username box.
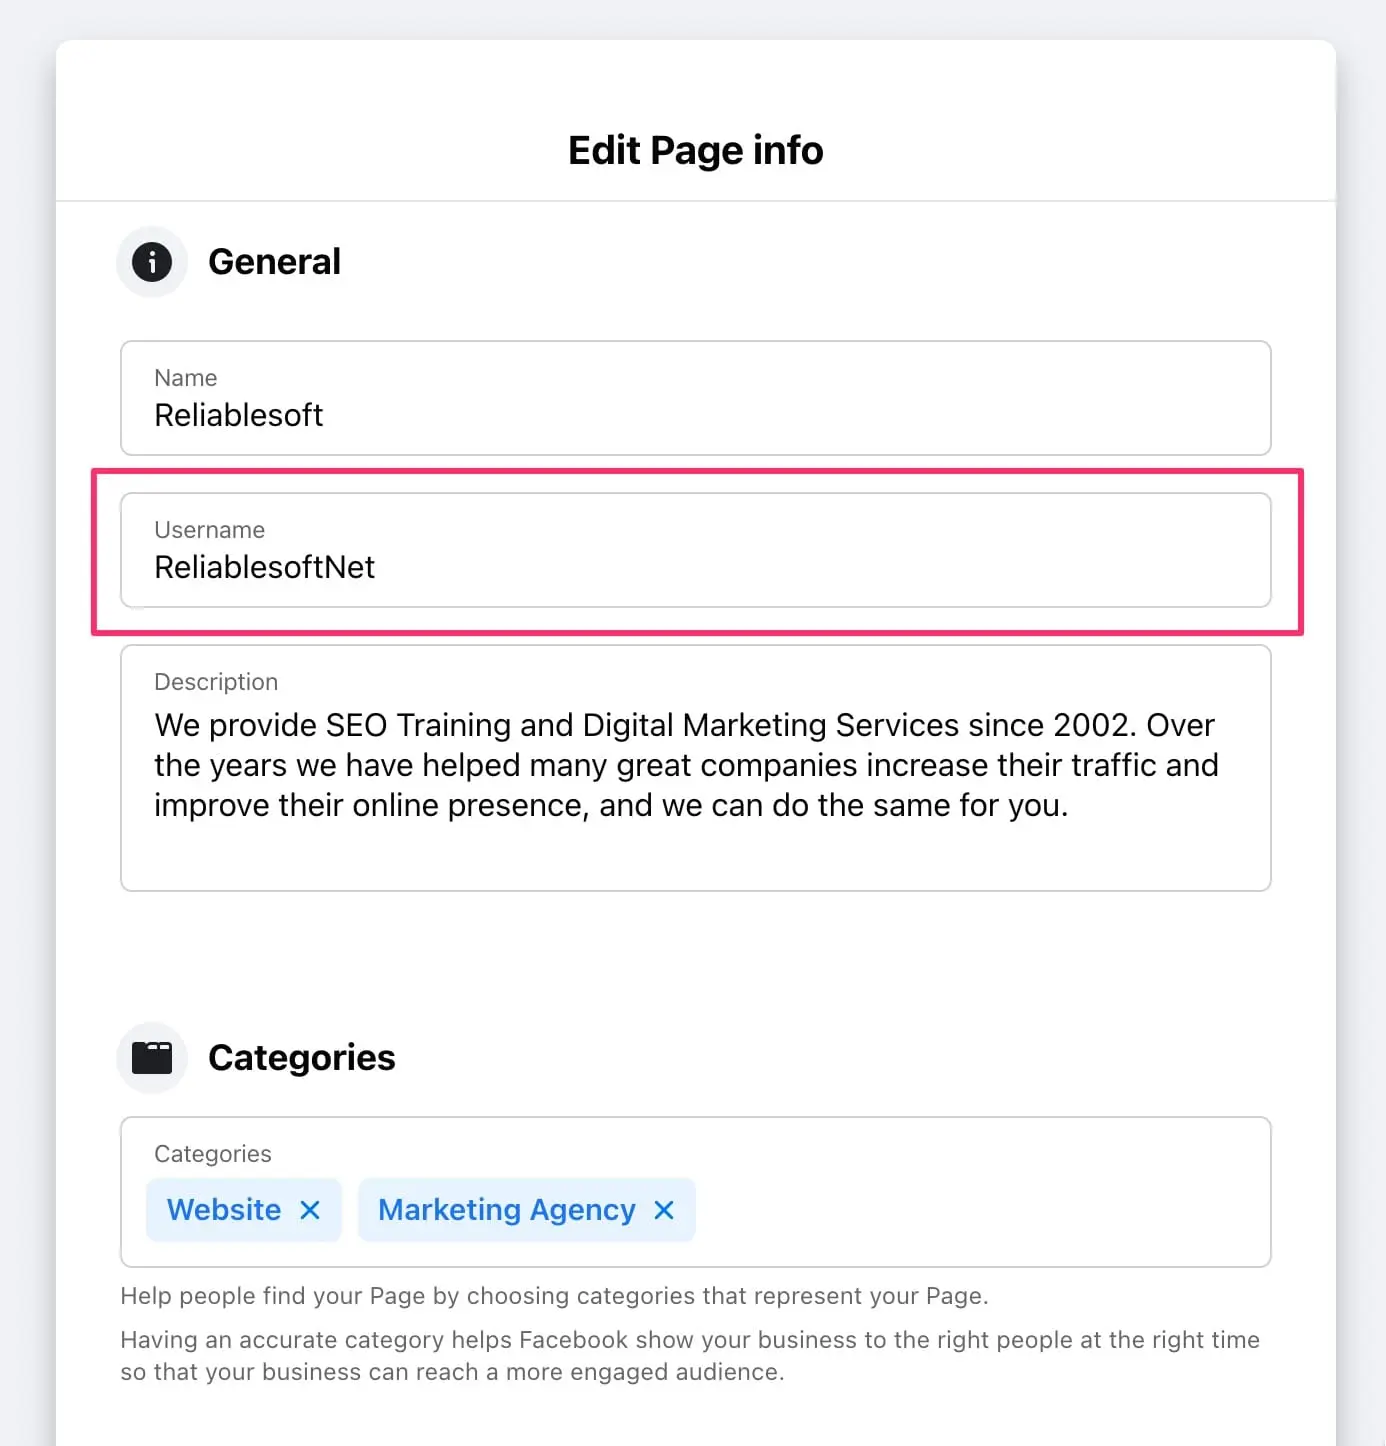
Type your desired username and click anywhere outside the box. Facebook will check if the username is valid and available. If it’s accepted, you will see a green checkbox or an error message if there is an issue with your chosen name.
The guidelines for business page usernames are:
- Each page should have a unique username.
- You cannot use the username of a known brand, organization, or public figure.
- You cannot use the official name of another business.
- Usernames cannot contain generic terms or extensions (.com, .net).
- Usernames can contain alphabet characters (A-Z), numbers (0-9), and periods (“.”).
8. Edit page info

The next step is to review the rest of the options available in the “Edit Page Info” screen to provide additional information about your business, such as:
- Phone number
- Location - If you’re a local business, provide a business location.
- Service area
- Opening hours
- Privacy Policy
- Links to your other social media accounts (Instagram, Twitter, etc)
9. Review page settings
The final step is to familiarize yourself with the general page settings. To do this, look for the "Settings" option in the left menu.
Once clicked, you’ll notice several new options for controlling different aspects of your page. You can review or change the settings of each option individually.

In most cases, you won’t have to change anything, but it’s highly recommended that you manually review all settings at least once.
10. Publish your first post
Congratulations, you’ve just created your first business page on Facebook! Now, you’re ready to publish your first post. Click the “Create Post” button and publish your first business message.
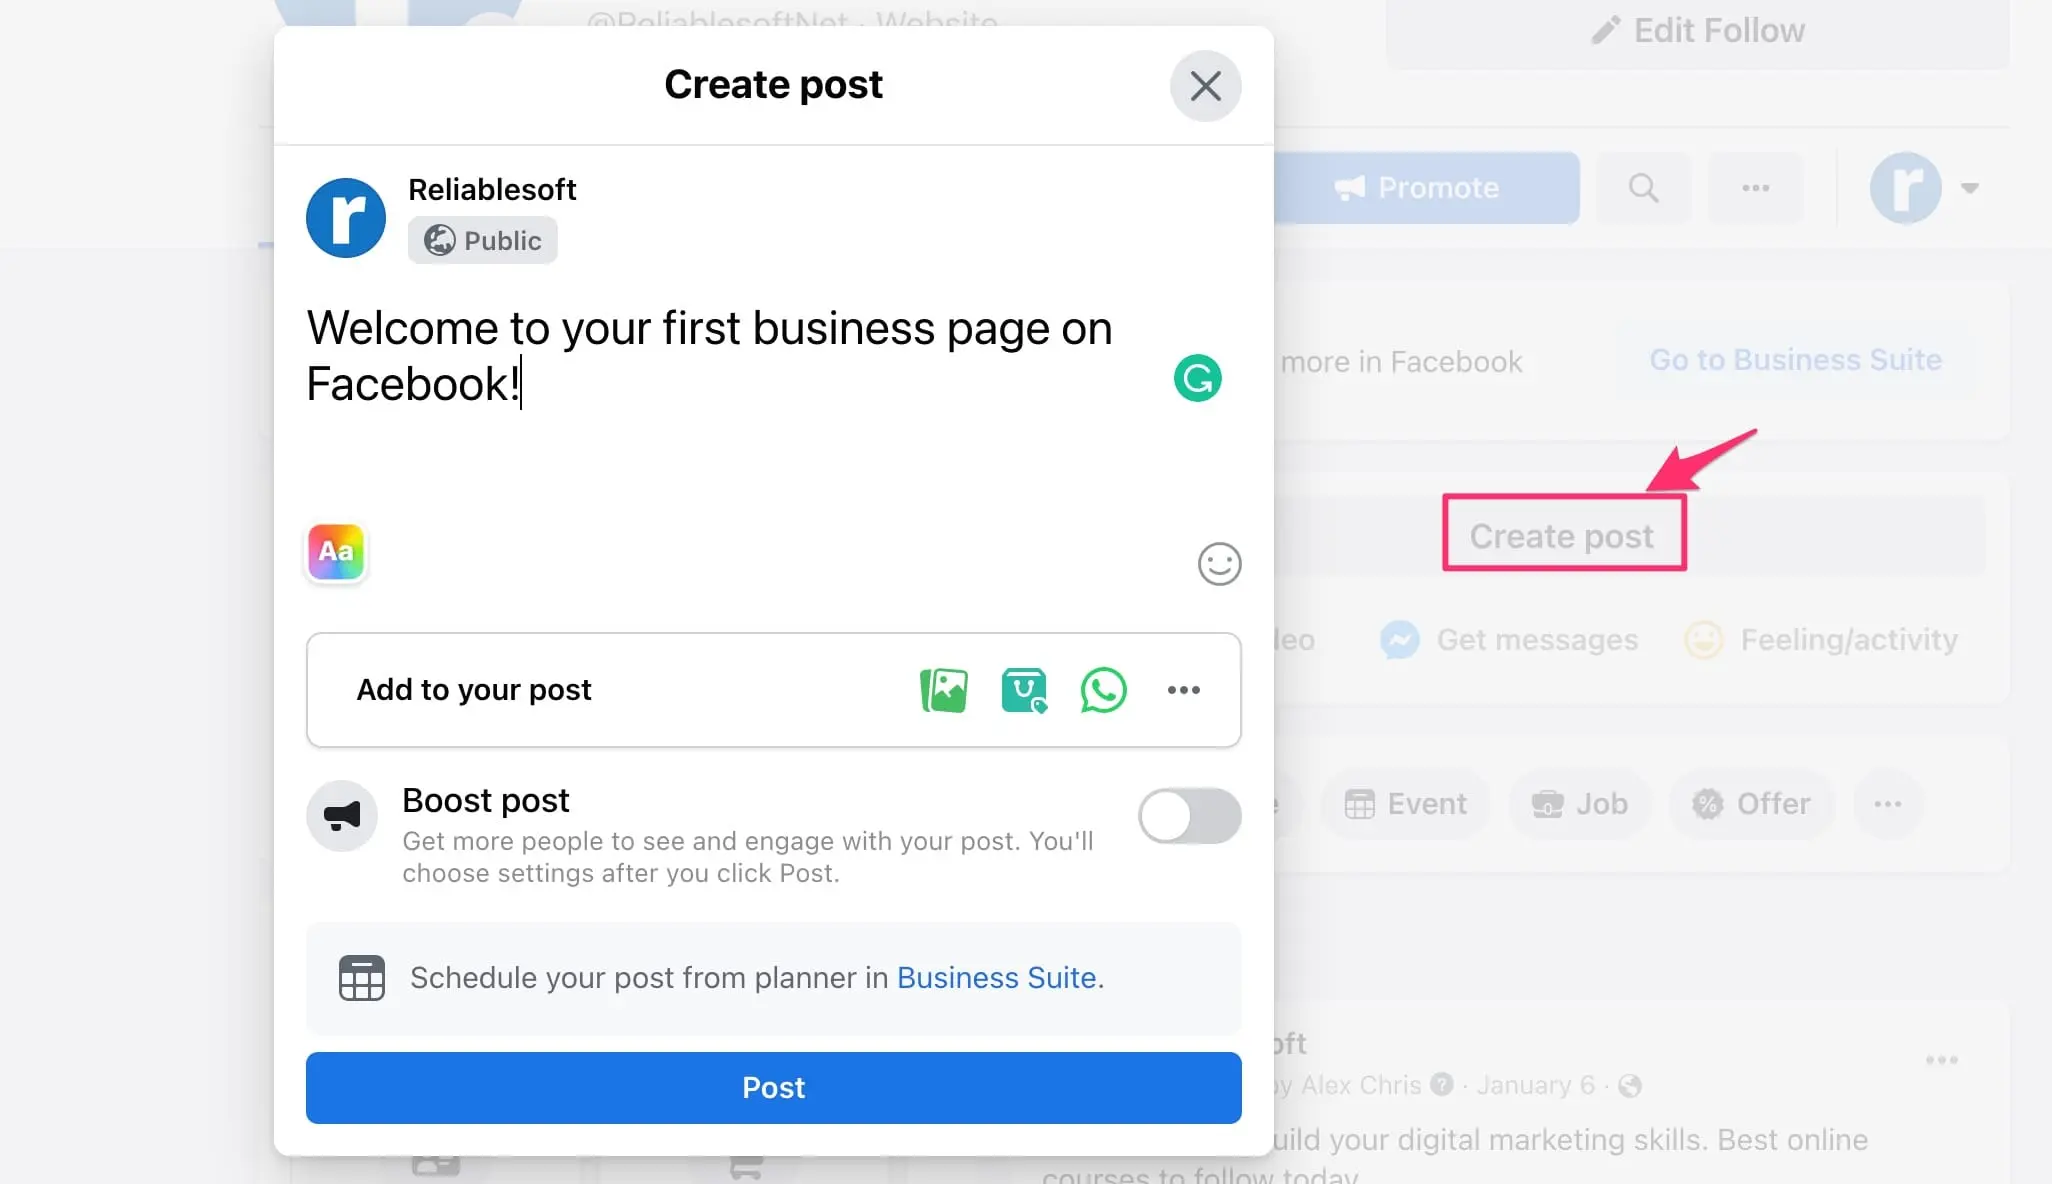
No one will likely see your post at this stage because the page has no followers. So, your next step is to use some techniques to increase your Facebook followers.
What You Can Do With a Facebook Business Page?
The main reasons for creating a Facebook Business page are to showcase your products and services and connect with your existing and potential customers on Facebook.
To do this successfully, you need to grow your page's audience and engagement. You can do this using several techniques. The most important are:
Grow your audience organically
- Share your page on your personal news feed and ask your friends to share and like your business page.
- Start using Facebook with your business profile, post content in groups, comment on posts, and generally become more visible so that your page gets noticed.
- Publish useful content that your followers might find interesting to like and share.
Promote your business using paid advertising
A faster way to increase the popularity of your business page is to use Facebook paid ads. You can run several ad campaigns to boost the visibility of your posts or increase the number of people who follow your page.
Facebook has become the most competitive online channel for businesses, and if you don't know exactly what you're doing, you're very likely to lose money. So use paid ads wisely by building your own skills or getting the help of professionals.
Create a Facebook shop
If you're selling products or services, you can create a Facebook or Instagram shop to showcase them. You can then post your products on Facebook Marketplace or promote them using paid ads.
Facebook Business Pages FAQ
Here is a list of people's most common questions about Facebook Business Pages.
Is there a difference between a Facebook page and a Facebook business page?
A Facebook Business page represents a brand, business entity, organization, or public figure on Facebook, while a personal page is for a single person. Businesses can showcase their products and services on a business page and share news and updates with their users.
You can have a maximum of 5000 friends on a personal page and unlimited followers on a business page.
Is a Facebook business page free?
Yes, you can create a page for your business on Facebook without paying anything. All you need is a personal Facebook account.
Are Facebook pages mobile-friendly?
Yes, your pages look good on all devices, including desktops and mobile phones.
Can I delete a Facebook business page?
Yes, you can remove a page by selecting the "Remove a Page" option from "Settings." A page will be deleted 14 days after you make the request.
Conclusion
Establishing your business's presence on Facebook is important for all kinds of businesses. Facebook is the king of social networks with millions of active users, and creating a business page is the first step to connecting with them.
The process is easy and only takes a few minutes to complete. What is important is that your page name and username (URL) are representative of your business and consistent with those you use on other social networks.